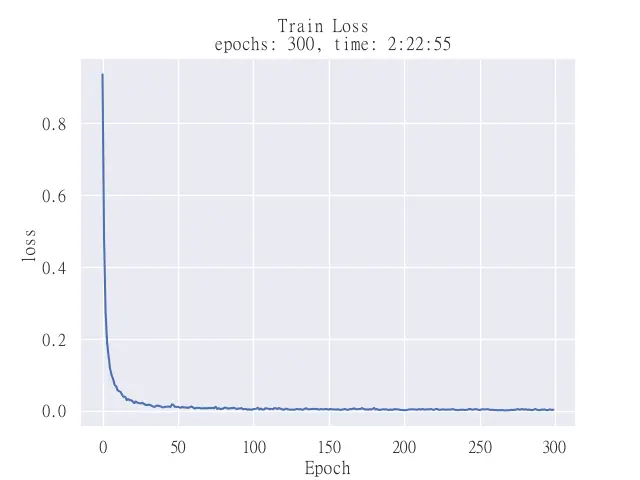
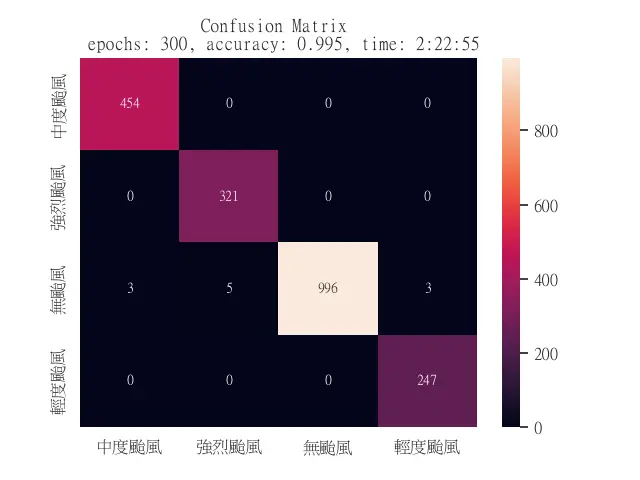
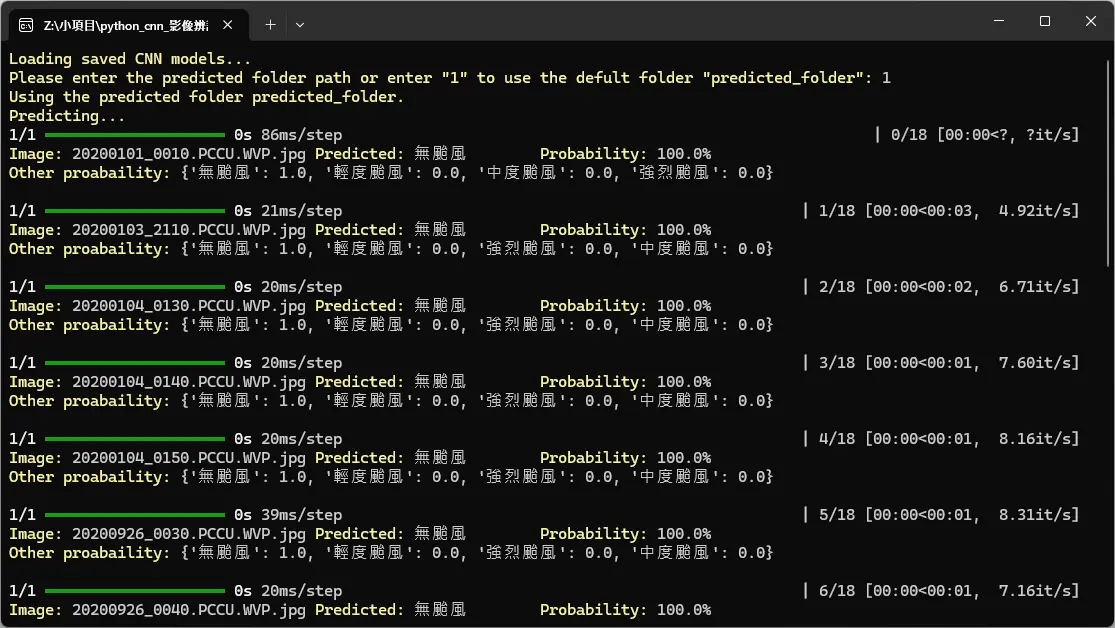
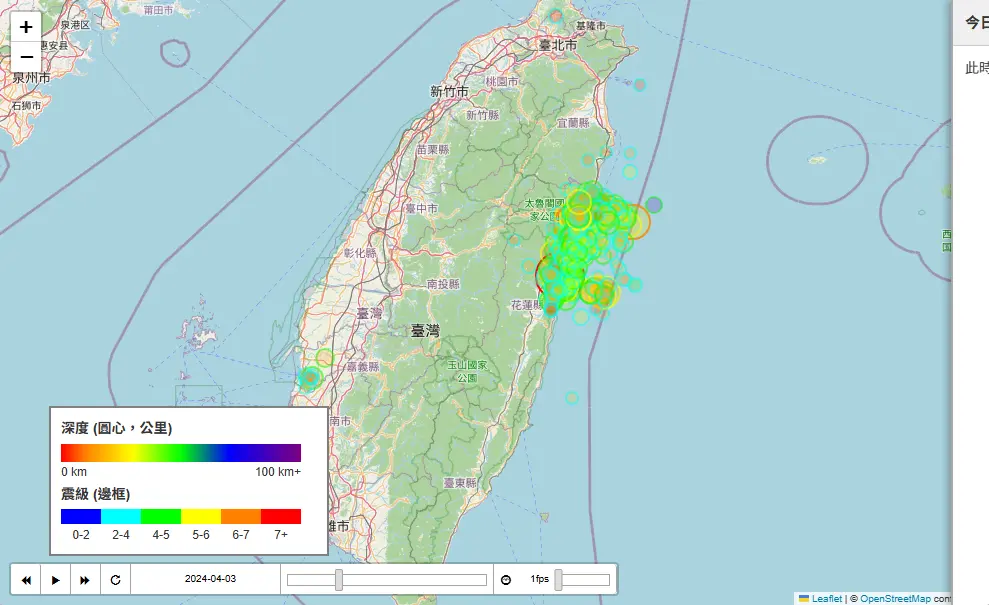
1
  2
  3
  4
  5
  6
  7
  8
  9
 10
 11
 12
 13
 14
 15
 16
 17
 18
 19
 20
 21
 22
 23
 24
 25
 26
 27
 28
 29
 30
 31
 32
 33
 34
 35
 36
 37
 38
 39
 40
 41
 42
 43
 44
 45
 46
 47
 48
 49
 50
 51
 52
 53
 54
 55
 56
 57
 58
 59
 60
 61
 62
 63
 64
 65
 66
 67
 68
 69
 70
 71
 72
 73
 74
 75
 76
 77
 78
 79
 80
 81
 82
 83
 84
 85
 86
 87
 88
 89
 90
 91
 92
 93
 94
 95
 96
 97
 98
 99
100
101
102
103
104
105
106
107
108
109
110
111
112
113
114
115
116
117
118
119
120
121
122
123
124
125
126
127
128
129
130
131
132
133
134
135
136
137
138
139
140
141
142
143
144
145
146
147
148
149
150
151
152
153
154
155
156
157
158
159
160
161
162
163
164
165
166
167
168
169
170
171
172
173
174
175
176
177
178
179
180
181
182
183
184
185
186
187
188
189
190
191
192
193
194
195
196
197
198
199
200
201
202
203
204
205
206
207
208
209
210
211
212
213
214
215
216
217
218
219
220
221
222
223
224
225
226
227
228
229
230
231
232
233
234
235
236
237
238
239
240
241
242
243
244
245
246
247
248
249
250
251
252
| ### import module
import os
os.environ['TF_ENABLE_ONEDNN_OPTS'] = '0'
os.environ['CUDA_VISIBLE_DEVICES'] = '0'
import datetime
import numpy as np
from keras.api import Input
from keras.api.layers import MaxPooling2D, Conv2D, Dense, Dropout, Flatten
from keras.api.models import Sequential
from keras.api.utils import plot_model
from sklearn.metrics import confusion_matrix
from sklearn.model_selection import train_test_split
from sklearn.utils import shuffle
from tqdm import tqdm
import cv2
import matplotlib.pyplot as plt
import seaborn as sn
sn.set_theme(font_scale=1.1, font='MingLiU')
plt.rcParams['axes.unicode_minus'] = False
import json
### function
# first setting
def config():
if not os.path.exists('config'):
print('\033[93mCreating \"config\" folder...\033[0m')
os.mkdir('config')
readme_content = [
r'1. 使用 python 於 cnn_model.py 進行模型訓練前,請先於終端機運行 "pip install -r config\pip_install_need.txt" 安裝所需模組,並同時於 https://graphviz.gitlab.io/download/ 下載安裝所需套件,以避免程式執行時報錯。',
r'2. 要訓練的圖片請預先分類在不同資料夾,並將資料夾名稱設為類別名稱,如 "人類" 資料夾中含有各種人類的圖片。',
r'3. 訓練資料夾預設為 "config\train_folder" ,如果訓練資料夾中未含有檔案或任意訓練資料夾的子資料夾未含有檔案,則會報錯。'
]
pip_install_need_content = ['keras', 'tensorflow', 'tqdm', 'pydot', 'opencv-python', 'matplotlib', 'scikit-learn', 'numpy', 'seaborn', 'json']
print('\033[93mCreating \"config\\Readme.md\" file...\033[0m')
with open('config\\Readme.md', 'w', encoding = 'utf-8') as readme_file:
for item in readme_content:
readme_file.write(f'{item}\n')
with open('config\\pip_install_need.txt', 'w', encoding = 'utf-8') as pip_file:
for item in pip_install_need_content:
pip_file.write(f'{item}\n')
print('\033[93mDone.\033[0m')
print(f'\033[93mIf this is your first time using this program, please read the Readme.md file located in \"{os.path.join(os.getcwd(), 'config\\Readme.md')}\".\033[0m')
# input path
def input_train_folder_path():
if not os.path.exists('config\\train_folder'):
os.mkdir('config\\train_folder')
while True:
folder_path = input(f'\033[93mPlease enter the trained folder path or enter \"1\" to use the defult folder \"config\\train_folder\":\033[0m ')
if folder_path == '1':
return 'config\\train_folder'
elif os.path.exists(folder_path):
return folder_path
print('TypeError: invalid folder path or the folder does not exist. Please enter a valid folder path.')
# input Training-to-Testing split ratio
def train_test_ratio():
while True:
rate = input(f'\033[93mPlease enter the Training-to-Testing split ratio:\033[0m ')
try:
rate = float(rate)
if 0 < rate < 1:
print(f'The Training-to-Testing split ratio has set from train * {rate} and test * {1 - rate}.')
return rate
else:
print('ValueError: Training-to-Testing split ratio must be a float between 0 and 1.')
except ValueError:
print('ValueError: Training-to-Testing split ratio must be a float point number.')
# load data from folder and data clean
def load_data(train_folder, image_size, train_rate, class_names_label):
output, images, labels = [], [], []
for folder in os.listdir(train_folder): # process from each child-folder
label = class_names_label[folder]
print(f'\033[93mLoading {folder}\033[0m')
for file in tqdm(os.listdir(os.path.join(train_folder, folder))): # process from each image in each child-folder
img_path = os.path.join(os.path.join(train_folder, folder), file) # get the path from each image
image = cv2.imdecode(np.fromfile(img_path, dtype = np.uint8), -1) # get the path by using np.uint8 (for encoding utf-8)
image = cv2.cvtColor(image, cv2.COLOR_BGR2RGB) # change color format from BGR to RGB
image = cv2.resize(image, image_size) # change image size to image_size
images.append(image) # append image to array
labels.append(label) # append folder name to label
images = np.array(images, dtype = 'float32') # change images to numpy array, and the tpye 'float32'
labels = np.array(labels, dtype = 'int32') # change labels to numpy array, and the tpye 'int32'
train_images, test_images, train_labels, test_labels = train_test_split(images, labels, train_size = train_rate)
output.extend([(train_images, train_labels), (test_images, test_labels)])
return output
# save picture
def pic_save(pic_path, current_datetime): # use date time to save picture
filename = pic_path + '_' + current_datetime + '.png'
plt.savefig(filename)
return filename
# calculate accuracy
def accuracy(confusion_matrix):
diagonal_sum = confusion_matrix.trace()
sum_of_all_elements = confusion_matrix.sum()
return diagonal_sum / sum_of_all_elements
### main program
config()
train_folder = input_train_folder_path()
train_rate = train_test_ratio()
start_time = datetime.datetime.now().replace(microsecond = 0)
print(f'\033[93mLoading images from \"{train_folder}\".\033[0m')
class_names = os.listdir(train_folder) # classify by train_folder's name
class_names_label = {class_name: i for i, class_name in enumerate(class_names)} # get the label by class_names
classes_amount = len(class_names) # check how many classes we need to train
image_size = (128, 128) # set image size
(train_images, train_labels), (test_images, test_labels) = load_data( # deta clean
train_folder = train_folder,
image_size = image_size,
train_rate = train_rate,
class_names_label = class_names_label)
print(f'\033[93mUsing {datetime.datetime.now().replace(microsecond = 0) - start_time} to load the images.\033[0m')
# Iteration × Batch size = Epoch
while True:
try:
epochs = int(input('\033[93mPlease enter the training times (epochs):\033[0m '))
if epochs <= 0:
print('ValueError: the epoches must be a positive integer.')
else:
break
except ValueError:
print('ValueError: the epoches must be a positive integer.')
start_time = datetime.datetime.now().replace(microsecond = 0)
train_images, train_labels = shuffle(train_images, train_labels) # random the train set
# standardized
train_images = train_images / 255.0 # RGB have 255 levels
test_images = test_images / 255.0
# CNN modeling
input_shape = (image_size[0], image_size[1], 3) # image size and the hight 3 (since the RGB size is 3)
model = Sequential([
# 輸入
Input(shape = input_shape),
# 卷積層 # 特徵擷取
# 64, (3, 3) >> 神經元數目: 64, 掃描器大小: 3*3; padding: 掃描後與原圖做比較, activation: 激活函數, strides: 掃描頻率
Conv2D(64, (3, 3), padding = 'same', activation = 'relu', strides = 2),
# 池化層 # 特徵壓縮
# pool_size = (2, 2): 壓縮大小 2*2, strides: 壓縮頻率
MaxPooling2D(pool_size = (2, 2), strides = 2),
# 隨機丟棄部份資料
Dropout(0.2),
# 再次運算 >> 速度變慢,準確度提高
Conv2D(128, (3, 3), padding = 'same', activation = 'relu', strides = 2),
MaxPooling2D(pool_size = (2, 2), strides = 2),
Dropout(0.2),
# 攤平圖片資訊
Flatten(),
Dropout(0.5),
# 輸出層,分類用softmax
Dense(classes_amount, activation = 'softmax')
])
# 模型訓練方法
model.compile(optimizer = 'adam', # 最佳化演算法: adam
loss = 'sparse_categorical_crossentropy', # 損失函數: 混淆矩陣
metrics = ['accuracy']) # 準確度
history = model.fit(train_images, # 訓練數據(特徵)
train_labels, # 對應的目標(標籤)
# validation_data:驗證數據(特徵和對應的目標),用於在訓練過程中評估模型的性能
validation_data = (test_images, test_labels),
# verbose: 控制訓練過程中的輸出詳細程度。可以設定為 0(靜默)、1(進度條輸出)、2(每個 epoch 一行輸出)
verbose = 1,
# callbacks = [earlyStop],
batch_size = 256, # batch_size: 訓練中每個批次的樣本數量
epochs = epochs, # epochs: 訓練的迭代次數
shuffle = True) # shuffle: 是否在每個 epoch 開始時將訓練數據打亂
end_time = datetime.datetime.now().replace(microsecond = 0) - start_time
print(f'\033[93mTraing cost {end_time}.\033[0m')
# output config to json file
config_data = {
"class_names": class_names,
"image_size": image_size
}
with open('config\\config.json', 'w', encoding = 'utf-8') as config_file:
json.dump(obj = config_data, fp = config_file, ensure_ascii = False, indent = 4)
# save model
Saved_model = 'config\\Saved_model.keras'
model.save(Saved_model)
print(f'\033[93mModel had been save at \"{Saved_model}\".\033[0m')
# current date and time (for saving results)
current_datetime = datetime.datetime.now().strftime("%Y-%m-%dT%H_%M_%S")
# loss
if not os.path.exists('config\\result'):
os.mkdir('config\\result')
plt.figure()
plt.title(f'Train Loss \n epochs: {epochs}, time: {end_time}')
plt.ylabel('loss')
plt.xlabel('Epoch')
plt.plot(history.history['loss'])
save_path = pic_save(pic_path = 'config\\result\\loss', current_datetime = current_datetime)
print(f'\033[93mLoss function had been save at \"{save_path}\".\033[0m')
# test set (for calculate accuracy)
predictions = model.predict(test_images)
pred_labels = np.argmax(predictions, axis = 1)
# confusion matrix
CM = confusion_matrix(test_labels, pred_labels)
# accuracy
print(f'\033[93mAccuracy: {accuracy(CM)}.\033[0m')
# 混淆矩陣視覺化
plt.figure()
ax = plt.axes()
sn.heatmap(data = CM,
annot = True,
annot_kws = {'size': 10},
xticklabels = class_names,
yticklabels = class_names,
ax = ax,
fmt = '.20g')
ax.set_title(f'Confusion Matrix \n epochs: {epochs}, accuracy: {accuracy(CM):.3f}, time: {end_time}')
save_path = pic_save(pic_path = 'config\\result\\confusion_matrix', current_datetime = current_datetime)
print(f'\033[93mConfusion matrix had been save at \"{save_path}\".\033[0m')
# model's image (need to install Graphviz by https://graphviz.gitlab.io/download/)
try:
pic = 'config\\result\\model_' + current_datetime + '.png' # model's image file name
plot_model(model, show_shapes = True, expand_nested = True, to_file = pic)
print(f'\033[93mModel\'s training image had been saved at \"{pic}\".\033[0m')
except:
print(f'\033[93mThere has some problem to save model\'s training image, please install Graphviz from https://graphviz.gitlab.io/download/.\033[0m')
# exist
while True:
if input('\033[93mEnter \"-1\" to exit:\033[0m ') == '-1':
break
input('Press any key to continue...')
|