# import modulesimporttorchimporttorch.nnasnnfromtypingimportOptional,UnionfromautoFRK.utils.loggerimportsetup_loggerfromautoFRK.utils.deviceimportsetup_devicefromautoFRK.utils.utilsimport*fromautoFRK.utils.predictorimport*# logger configLOGGER=setup_logger()# class AutoFRKclassAutoFRK(nn.Module):"""
Automatic Fixed Rank Kriging
This function performs resolution-adaptive fixed rank kriging on spatial
data observed at one or multiple time points using a spatial random-effects
model.
...
"""def__init__(self,mu:Union[float,torch.Tensor]=0.0,D:torch.Tensor=None,G:torch.Tensor=None,finescale:bool=False,maxit:int=50,tolerance:float=1e-6,maxK:int=None,Kseq:torch.Tensor=None,method:str="fast",n_neighbor:int=3,maxknot:int=5000,dtype:torch.dtype=torch.float64,device:Optional[Union[torch.device,str]]=None):"""
Initialize autoFRK model with tensor-safe and device-aware configuration.
"""super().__init__()...
Microsoft Windows [版本 10.0.26100.6584](c) Microsoft Corporation. 著作權所有,並保留一切權利。
C:\Users\user\Desktop\github\autoFRK-python\autoFRK>python -m build
* Creating isolated environment: venv+pip...
* Installing packages in isolated environment:
- setuptools>=61.0
- wheel
* Getting build dependencies for sdist...
C:\Users\user\AppData\Local\Temp\build-env-vieuwf3x\Lib\site-packages\setuptools\config\_apply_pyprojecttoml.py:82: SetuptoolsDeprecationWarning: `project.license` as a TOML table is deprecated
!!
********************************************************************************
Please use a simple string containing a SPDX expression for`project.license`. You can also use `project.license-files`. (Both options available on setuptools>=77.0.0).
By 2026-Feb-18, you need to update your project and remove deprecated calls
or your builds will no longer be supported.
See https://packaging.python.org/en/latest/guides/writing-pyproject-toml/#license for details.
********************************************************************************
!!
corresp(dist, value, root_dir)running egg_info
creating src\autoFRK.egg-info
writing src\autoFRK.egg-info\PKG-INFO
writing dependency_links to src\autoFRK.egg-info\dependency_links.txt
writing requirements to src\autoFRK.egg-info\requires.txt
writing top-level names to src\autoFRK.egg-info\top_level.txt
writing manifest file 'src\autoFRK.egg-info\SOURCES.txt'reading manifest file 'src\autoFRK.egg-info\SOURCES.txt'reading manifest template 'MANIFEST.in'warning: no files found matching '*.txt' under directory 'src\autoFRK'warning: no files found matching '*.md' under directory 'src\autoFRK'adding license file 'LICENSE'writing manifest file 'src\autoFRK.egg-info\SOURCES.txt'* Building sdist...
C:\Users\user\AppData\Local\Temp\build-env-vieuwf3x\Lib\site-packages\setuptools\config\_apply_pyprojecttoml.py:82: SetuptoolsDeprecationWarning: `project.license` as a TOML table is deprecated
!!
********************************************************************************
Please use a simple string containing a SPDX expression for`project.license`. You can also use `project.license-files`. (Both options available on setuptools>=77.0.0).
By 2026-Feb-18, you need to update your project and remove deprecated calls
or your builds will no longer be supported.
See https://packaging.python.org/en/latest/guides/writing-pyproject-toml/#license for details.
********************************************************************************
!!
corresp(dist, value, root_dir)running sdist
running egg_info
writing src\autoFRK.egg-info\PKG-INFO
writing dependency_links to src\autoFRK.egg-info\dependency_links.txt
writing requirements to src\autoFRK.egg-info\requires.txt
writing top-level names to src\autoFRK.egg-info\top_level.txt
reading manifest file 'src\autoFRK.egg-info\SOURCES.txt'reading manifest template 'MANIFEST.in'warning: no files found matching '*.txt' under directory 'src\autoFRK'warning: no files found matching '*.md' under directory 'src\autoFRK'adding license file 'LICENSE'writing manifest file 'src\autoFRK.egg-info\SOURCES.txt'running check
creating autofrk-0.1.0
creating autofrk-0.1.0\src\autoFRK
creating autofrk-0.1.0\src\autoFRK.egg-info
creating autofrk-0.1.0\src\autoFRK\utils
copying files to autofrk-0.1.0...
copying LICENSE -> autofrk-0.1.0
copying MANIFEST.in -> autofrk-0.1.0
copying README.md -> autofrk-0.1.0
copying pyproject.toml -> autofrk-0.1.0
copying src\autoFRK\___init__.py -> autofrk-0.1.0\src\autoFRK
copying src\autoFRK\autoFRK.py -> autofrk-0.1.0\src\autoFRK
copying src\autoFRK\mrts.py -> autofrk-0.1.0\src\autoFRK
copying src\autoFRK.egg-info\PKG-INFO -> autofrk-0.1.0\src\autoFRK.egg-info
copying src\autoFRK.egg-info\SOURCES.txt -> autofrk-0.1.0\src\autoFRK.egg-info
copying src\autoFRK.egg-info\dependency_links.txt -> autofrk-0.1.0\src\autoFRK.egg-info
copying src\autoFRK.egg-info\requires.txt -> autofrk-0.1.0\src\autoFRK.egg-info
copying src\autoFRK.egg-info\top_level.txt -> autofrk-0.1.0\src\autoFRK.egg-info
copying src\autoFRK\utils\___init__.py -> autofrk-0.1.0\src\autoFRK\utils
copying src\autoFRK\utils\device.py -> autofrk-0.1.0\src\autoFRK\utils
copying src\autoFRK\utils\logger.py -> autofrk-0.1.0\src\autoFRK\utils
copying src\autoFRK\utils\predictor.py -> autofrk-0.1.0\src\autoFRK\utils
copying src\autoFRK\utils\utils.py -> autofrk-0.1.0\src\autoFRK\utils
copying src\autoFRK.egg-info\SOURCES.txt -> autofrk-0.1.0\src\autoFRK.egg-info
Writing autofrk-0.1.0\setup.cfg
Creating tar archive
removing 'autofrk-0.1.0'(and everything under it)* Building wheel from sdist
* Creating isolated environment: venv+pip...
* Installing packages in isolated environment:
- setuptools>=61.0
- wheel
* Getting build dependencies for wheel...
C:\Users\user\AppData\Local\Temp\build-env-exul05dl\Lib\site-packages\setuptools\config\_apply_pyprojecttoml.py:82: SetuptoolsDeprecationWarning: `project.license` as a TOML table is deprecated
!!
********************************************************************************
Please use a simple string containing a SPDX expression for`project.license`. You can also use `project.license-files`. (Both options available on setuptools>=77.0.0).
By 2026-Feb-18, you need to update your project and remove deprecated calls
or your builds will no longer be supported.
See https://packaging.python.org/en/latest/guides/writing-pyproject-toml/#license for details.
********************************************************************************
!!
corresp(dist, value, root_dir)running egg_info
writing src\autoFRK.egg-info\PKG-INFO
writing dependency_links to src\autoFRK.egg-info\dependency_links.txt
writing requirements to src\autoFRK.egg-info\requires.txt
writing top-level names to src\autoFRK.egg-info\top_level.txt
reading manifest file 'src\autoFRK.egg-info\SOURCES.txt'reading manifest template 'MANIFEST.in'warning: no files found matching '*.txt' under directory 'src\autoFRK'warning: no files found matching '*.md' under directory 'src\autoFRK'adding license file 'LICENSE'writing manifest file 'src\autoFRK.egg-info\SOURCES.txt'* Building wheel...
C:\Users\user\AppData\Local\Temp\build-env-exul05dl\Lib\site-packages\setuptools\config\_apply_pyprojecttoml.py:82: SetuptoolsDeprecationWarning: `project.license` as a TOML table is deprecated
!!
********************************************************************************
Please use a simple string containing a SPDX expression for`project.license`. You can also use `project.license-files`. (Both options available on setuptools>=77.0.0).
By 2026-Feb-18, you need to update your project and remove deprecated calls
or your builds will no longer be supported.
See https://packaging.python.org/en/latest/guides/writing-pyproject-toml/#license for details.
********************************************************************************
!!
corresp(dist, value, root_dir)running bdist_wheel
running build
running build_py
creating build\lib\autoFRK
copying src\autoFRK\autoFRK.py -> build\lib\autoFRK
copying src\autoFRK\mrts.py -> build\lib\autoFRK
copying src\autoFRK\___init__.py -> build\lib\autoFRK
creating build\lib\autoFRK\utils
copying src\autoFRK\utils\device.py -> build\lib\autoFRK\utils
copying src\autoFRK\utils\logger.py -> build\lib\autoFRK\utils
copying src\autoFRK\utils\predictor.py -> build\lib\autoFRK\utils
copying src\autoFRK\utils\utils.py -> build\lib\autoFRK\utils
copying src\autoFRK\utils\___init__.py -> build\lib\autoFRK\utils
running egg_info
writing src\autoFRK.egg-info\PKG-INFO
writing dependency_links to src\autoFRK.egg-info\dependency_links.txt
writing requirements to src\autoFRK.egg-info\requires.txt
writing top-level names to src\autoFRK.egg-info\top_level.txt
reading manifest file 'src\autoFRK.egg-info\SOURCES.txt'reading manifest template 'MANIFEST.in'warning: no files found matching '*.txt' under directory 'src\autoFRK'warning: no files found matching '*.md' under directory 'src\autoFRK'adding license file 'LICENSE'writing manifest file 'src\autoFRK.egg-info\SOURCES.txt'installing to build\bdist.win-amd64\wheel
running install
running install_lib
creating build\bdist.win-amd64\wheel
creating build\bdist.win-amd64\wheel\autoFRK
copying build\lib\autoFRK\autoFRK.py -> build\bdist.win-amd64\wheel\.\autoFRK
copying build\lib\autoFRK\mrts.py -> build\bdist.win-amd64\wheel\.\autoFRK
creating build\bdist.win-amd64\wheel\autoFRK\utils
copying build\lib\autoFRK\utils\device.py -> build\bdist.win-amd64\wheel\.\autoFRK\utils
copying build\lib\autoFRK\utils\logger.py -> build\bdist.win-amd64\wheel\.\autoFRK\utils
copying build\lib\autoFRK\utils\predictor.py -> build\bdist.win-amd64\wheel\.\autoFRK\utils
copying build\lib\autoFRK\utils\utils.py -> build\bdist.win-amd64\wheel\.\autoFRK\utils
copying build\lib\autoFRK\utils\___init__.py -> build\bdist.win-amd64\wheel\.\autoFRK\utils
copying build\lib\autoFRK\___init__.py -> build\bdist.win-amd64\wheel\.\autoFRK
running install_egg_info
Copying src\autoFRK.egg-info to build\bdist.win-amd64\wheel\.\autoFRK-0.1.0-py3.12.egg-info
running install_scripts
creating build\bdist.win-amd64\wheel\autofrk-0.1.0.dist-info\WHEEL
creating 'C:\Users\user\Desktop\github\autoFRK-python\autoFRK\dist\.tmp-mxuu22cz\autofrk-0.1.0-py3-none-any.whl' and adding 'build\bdist.win-amd64\wheel' to it
adding 'autoFRK/___init__.py'adding 'autoFRK/autoFRK.py'adding 'autoFRK/mrts.py'adding 'autoFRK/utils/___init__.py'adding 'autoFRK/utils/device.py'adding 'autoFRK/utils/logger.py'adding 'autoFRK/utils/predictor.py'adding 'autoFRK/utils/utils.py'adding 'autofrk-0.1.0.dist-info/licenses/LICENSE'adding 'autofrk-0.1.0.dist-info/METADATA'adding 'autofrk-0.1.0.dist-info/WHEEL'adding 'autofrk-0.1.0.dist-info/top_level.txt'adding 'autofrk-0.1.0.dist-info/RECORD'removing build\bdist.win-amd64\wheel
Successfully built autofrk-0.1.0.tar.gz and autofrk-0.1.0-py3-none-any.whl
C:\Users\user\Desktop\github\autoFRK-python\autoFRK>
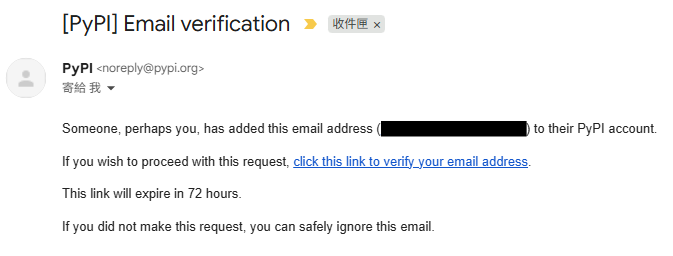
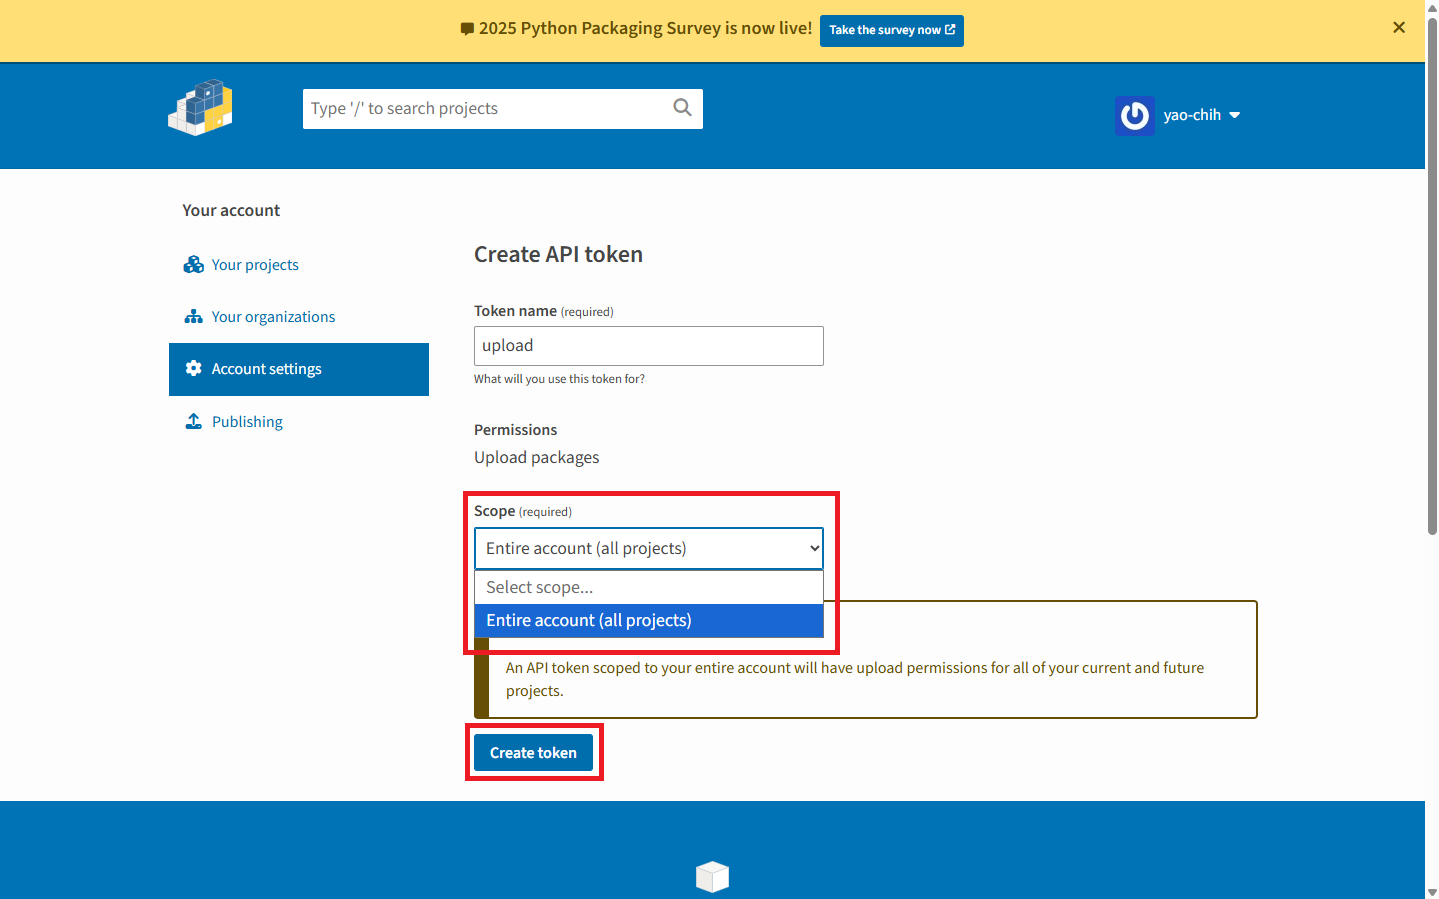
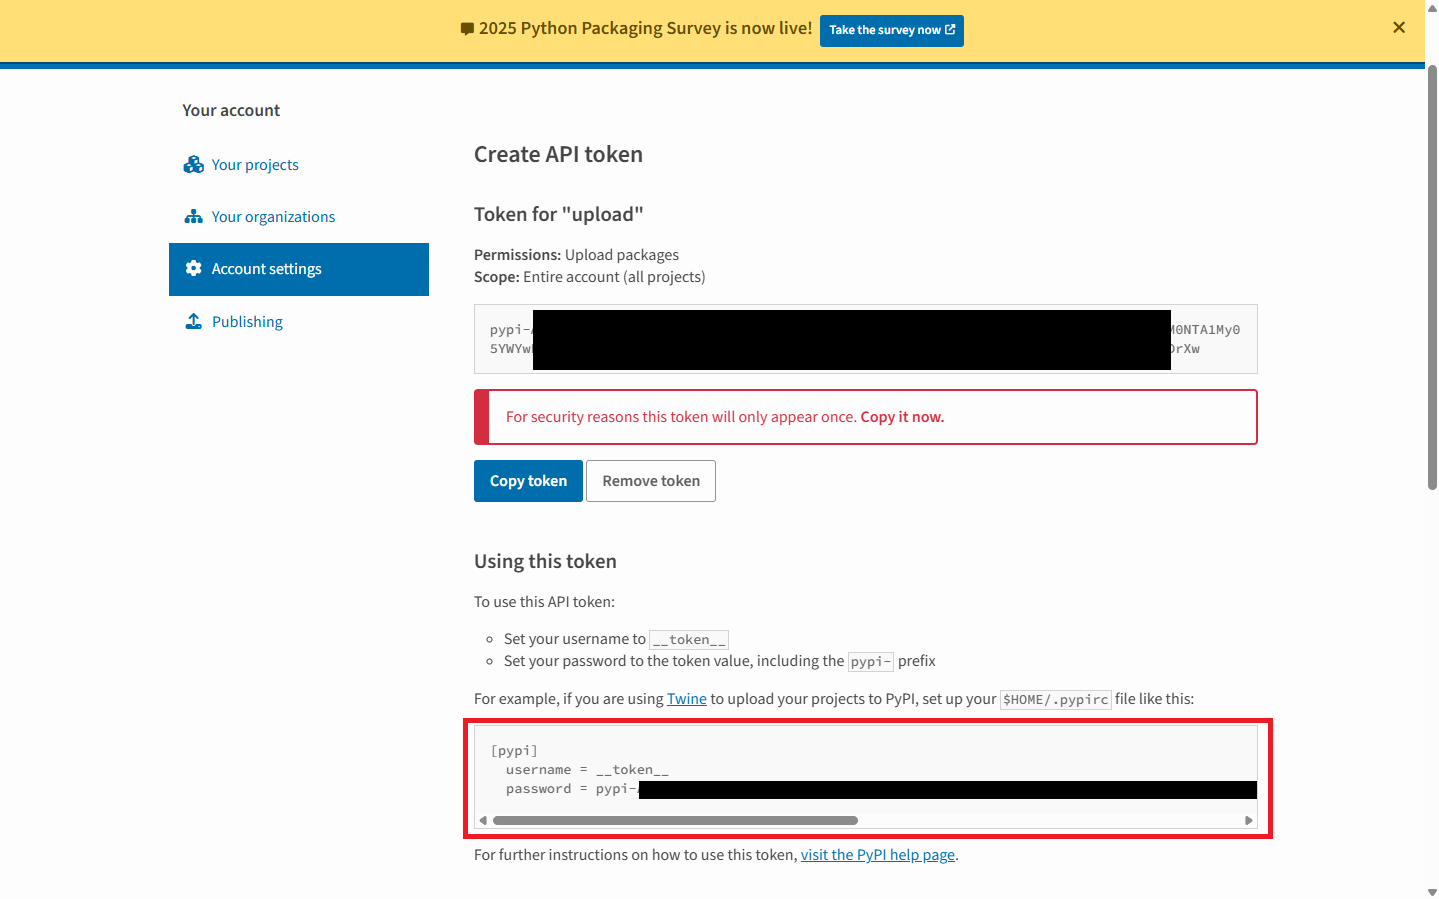
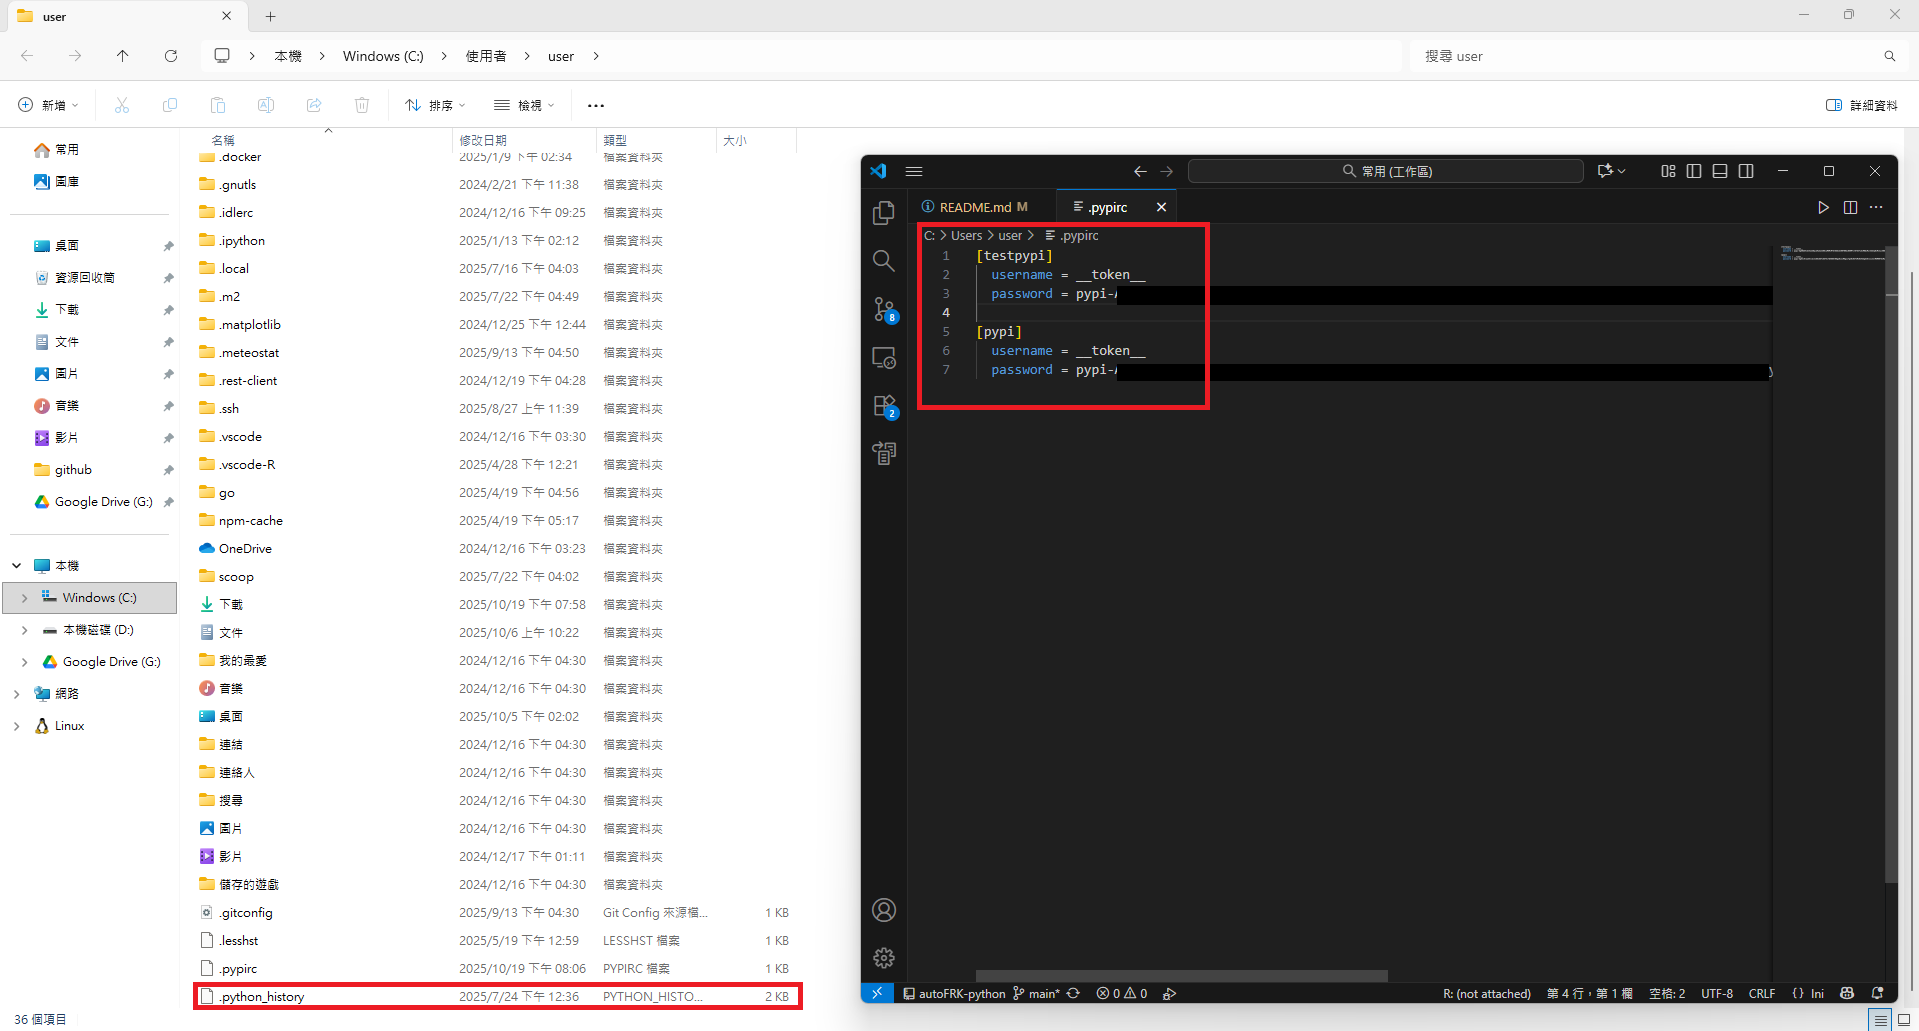
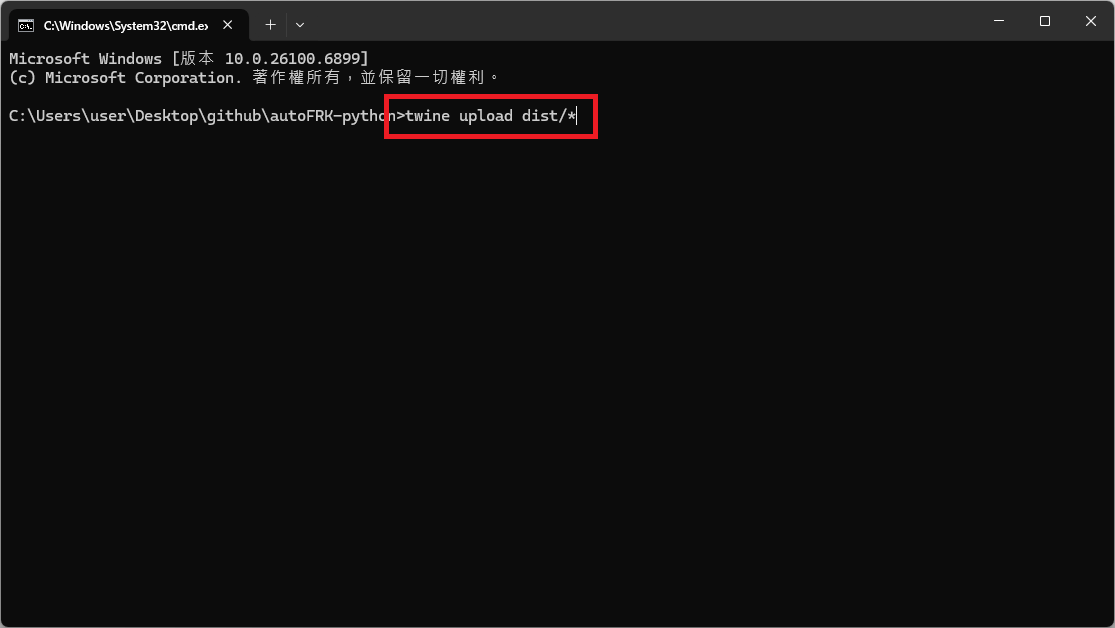
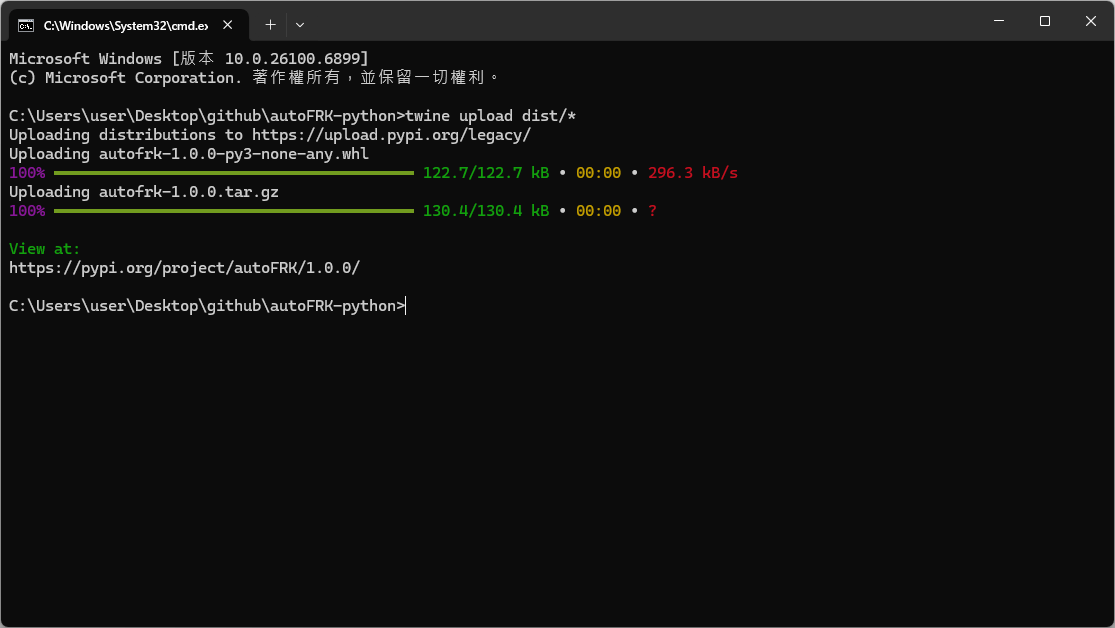
,顯然,製作成模組或許是最方便的方式之一。")