本地端的 LaTex 環境架設, Tex Live + VS Code 打造自己的 Overleaf

封面圖片為作者製作,包含 $\LaTeX$ 、 TeX Live 與 VS Code 標誌。
你是否已對 Overleaf 在編譯時超過時間限制而煩惱?有沒有過因為網路出現問題而無法線上編譯?或是使用 $\LaTeX$ 進行排版的新手?本篇文章將一步步帶領你在自己的電腦安裝 TeX Live 軟體,並使用 VS Code 作為 $\LaTeX$ 的編輯器。
$\LaTeX$ 是什麼?
$\LaTeX$ 是一種基於 $\TeX$ 的排版系統,與常見的 Microsoft Word 、 Google Docs 不同的是, $\LaTeX$ 不使用圖形化介面進行排版,而是由使用者透過一行行指令進行編寫。 $\LaTeX$ 初版由美國電腦科學家萊斯利·蘭伯特(Leslie Lamport)在 1984 年發布,其初衷即讓「使用者擺脫排版的麻煩」,即使使用者缺乏排版和程式設計等基礎知識,也能透過 $\LaTeX$ 輕鬆簡單地完成文件排版。 $\LaTeX$ 的排版不乏公式、圖表等數學、物理、工程領域常用元素,也包含音樂、西洋棋、象棋等排版工具,更擁有交叉引用、文獻引用、目錄編排等便利的功能,因此 $\LaTeX$ 也深受學術界與出版業的歡迎。
與一般使用圖形化介面的編輯軟體不同, $\LaTeX$ 採用「內容與格式分離」的編輯方式,即使用者無法立即查看編輯內容,而是得先經過 $\LaTeX$ 編譯器進行編譯,才可看到內容。這麼做的好處是,其儲存於 .tex 檔案中的檔案大小往往不大,方便進行版本控制且可確保在不同平臺產出的排版效果都一致。
正如前面所述, $\LaTeX$ 適合產出學術報告、論文等檔案,因此一般使用者除有需求外,仍可優先選用其他圖形化編輯器。若 $\LaTeX$ 初學者有學術報告的排版需求,也可以先嘗試線上免費工具,如 Overleaf ,以降低 $\LaTeX$ 的學習門檻與避免安裝編譯器時遇到的問題。
以下將從安裝 TeX Live 開始,寫下我的安裝流程,並使用 VS Code 作為 $\LaTeX$ 的文本編輯器。
安裝 TeX Live
首先,前往 https://tug.org/texlive/acquire-iso.html 下載所需的軟體。
第一步,點擊 installing TeX Live over the Internet 。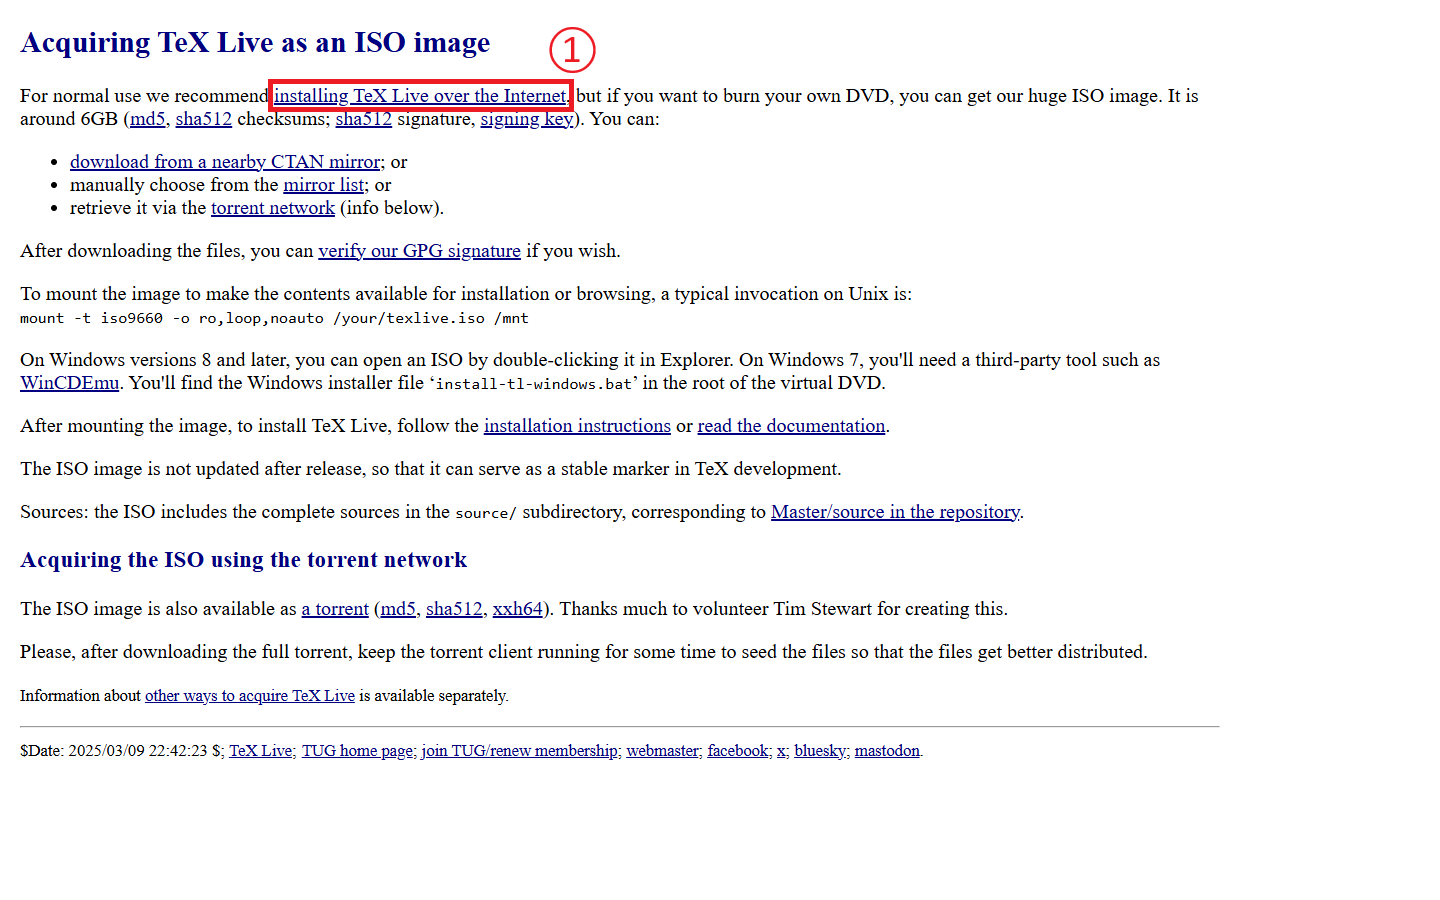
第二步,依照對應系統下載安裝執行檔,這裡以 Windows 11 操作系統為例,點擊 install-tl-windows.exe 。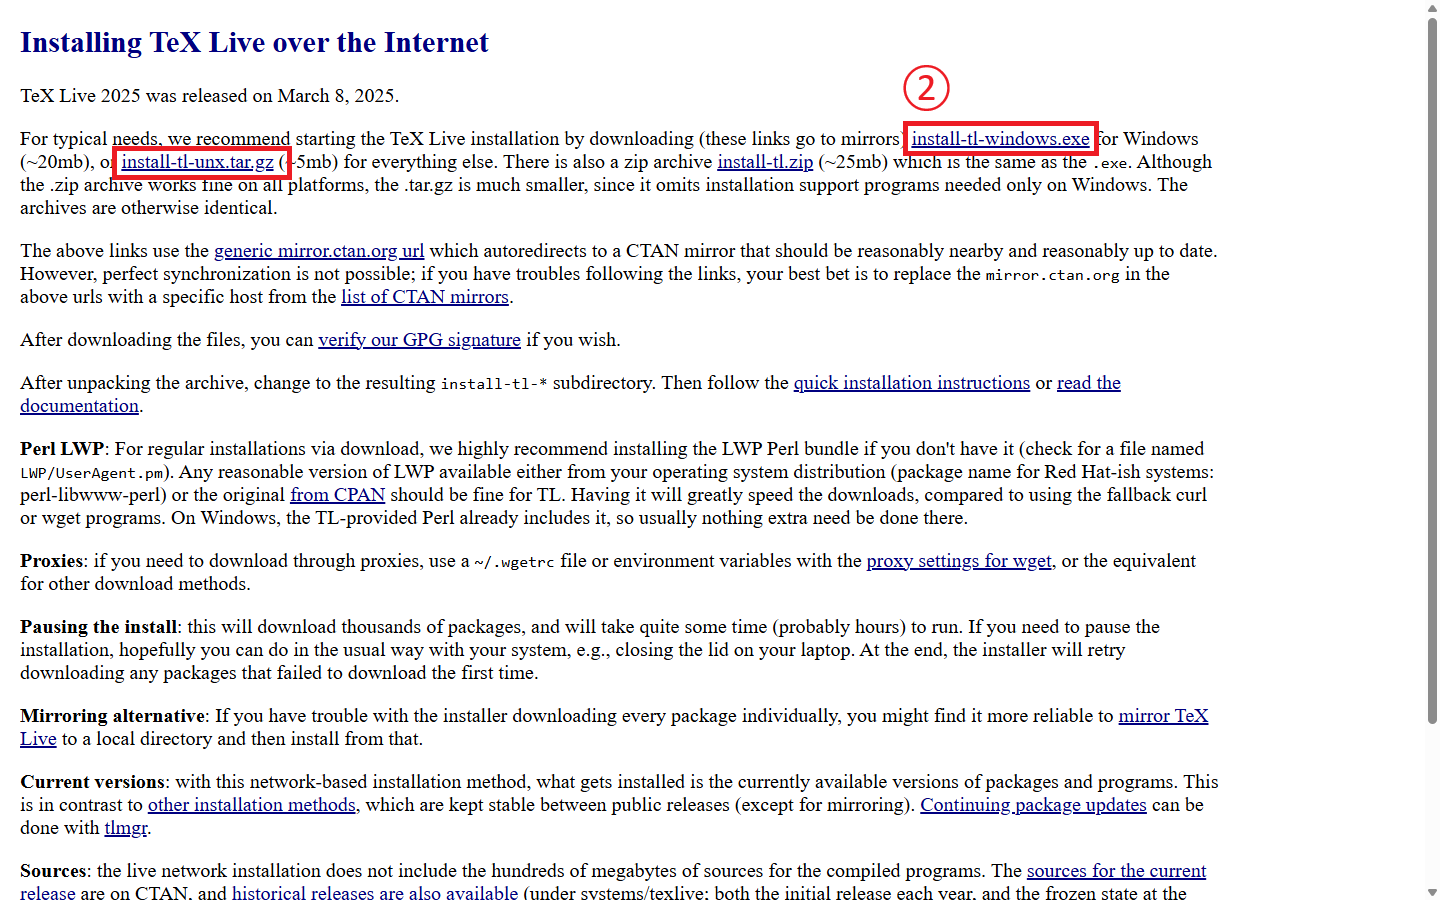
第三步,開啟剛下載的 TeX Live 安裝執行檔,如果遇到安全防護,點擊其他資訊。
第四步,點擊仍要執行。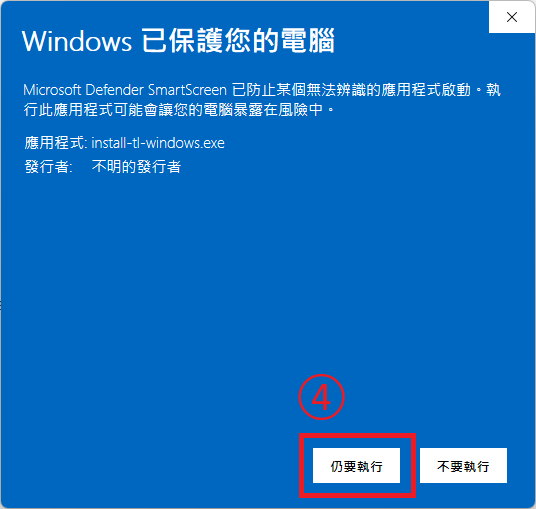
第五步,點擊 Install 。
第六步,點擊 Next > 。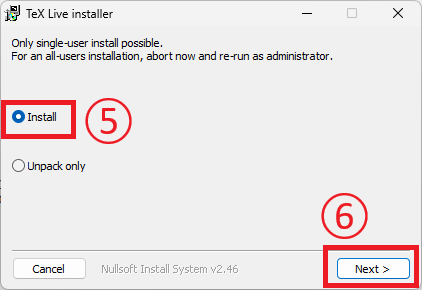
第七步,點擊 Install 。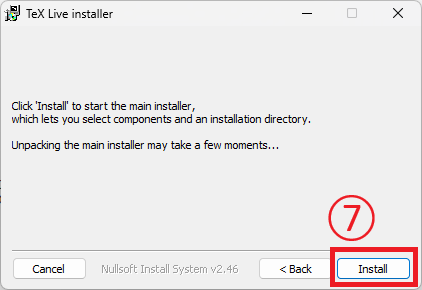
等待初始化安裝。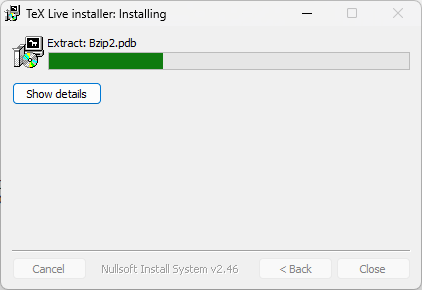
出現安裝程式介面即可開始安裝。
第八步,點擊進階。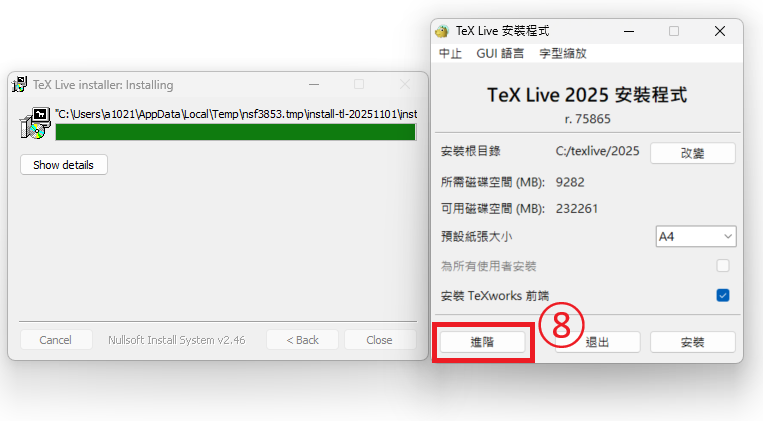
第九步,選擇安裝的根目錄,不一定需要修改。
第十步,點擊自訂。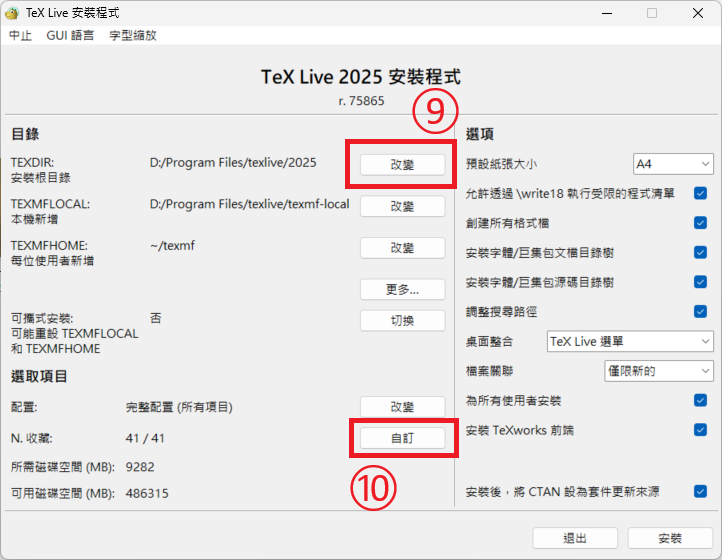
第十一步,選擇之後撰寫 $\LaTeX$ 時會用到的語言,並點擊確定。一般會至少選用中文、中文/日文/韓文(基本)、英文。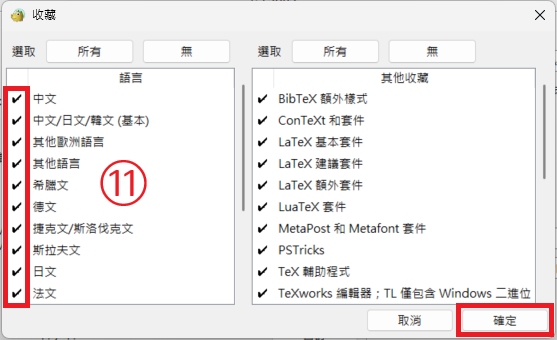
第十二步,若無其他需要調整,點擊安裝。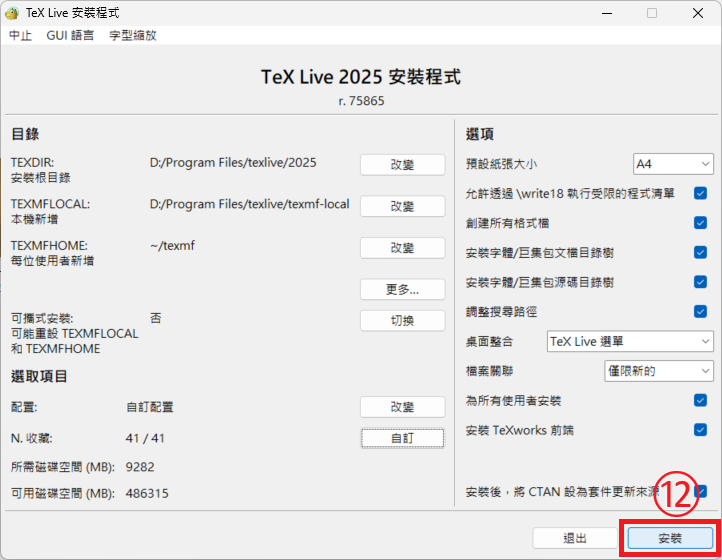
接下來就等待安裝即可,安裝程式會從網路上下載對應的檔案並安裝,安裝時務必保持網路暢通。安裝過程並不會消耗太多網路,可以繼續正常使用電腦。但需要注意的是,安裝時長偏長,依照先前選用的安裝,可能需等待 3 至 5 小時。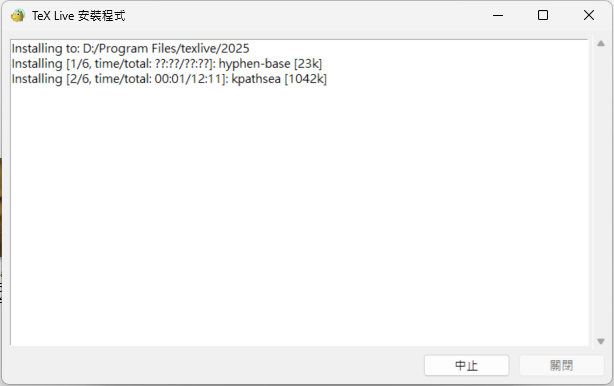
當看到 running package-specific postactions 且不再更新安裝畫面時,即可能為安裝完畢。此時,可以至安裝目錄查看安裝日誌,確保完成安裝。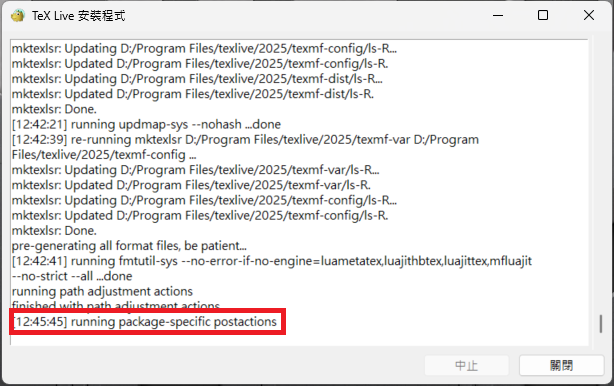
第十三步,移至安裝資料夾,一般為 安裝根目錄/texlive/2025/ 。
第十四步,開啟 install-tl.log 檔案。
第十五步,查看是否有安裝完畢訊息及歡迎使用訊息。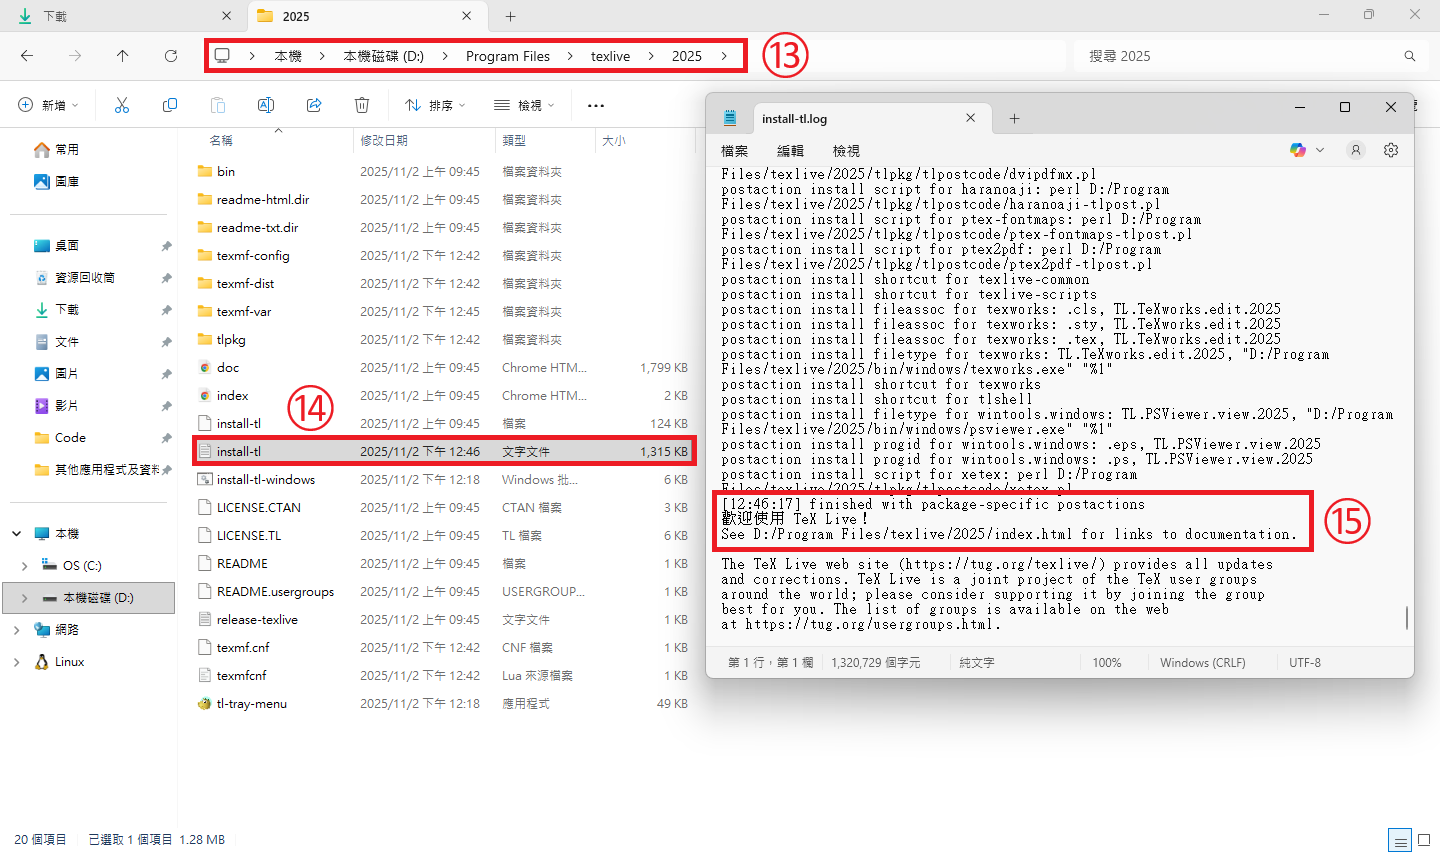
第十六步,點擊關閉,關閉 TeX Live 安裝程式。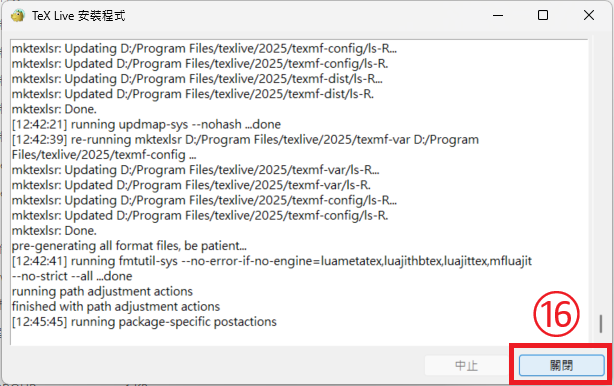
第十七步,點擊 Close 。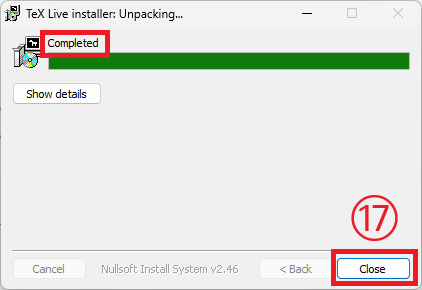
第十八步,開啟終端,如命令提示字符。並輸入
| |
確認有顯示編譯器相關資訊。如未出現,可能需要設定環境變數,請參考第十九至二十七步。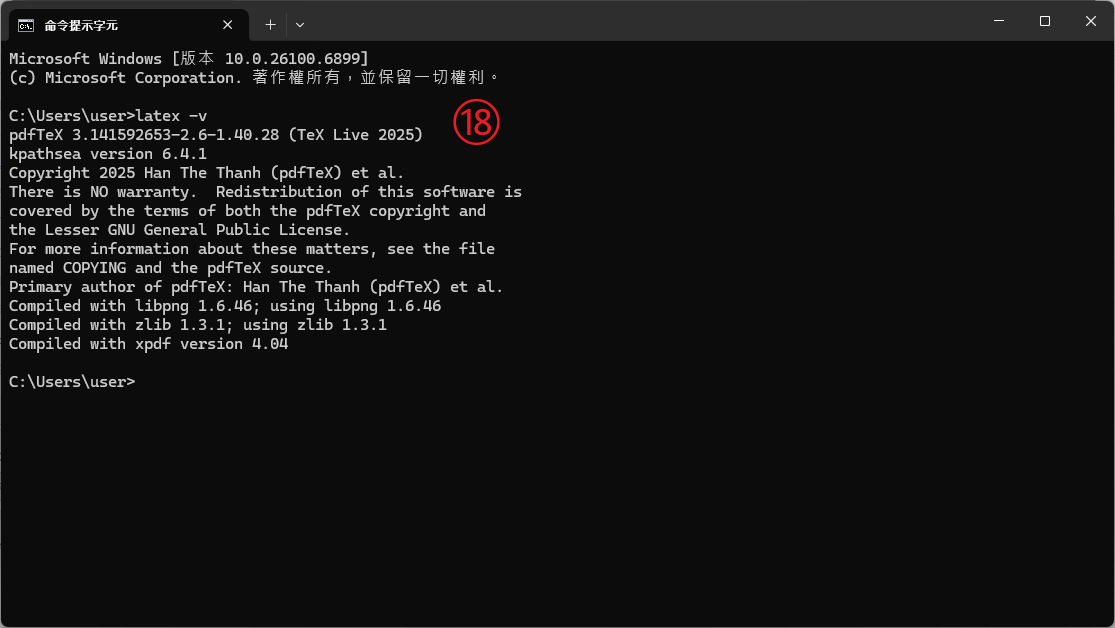
第十九步,點擊或使用快捷鍵 Win + i 開啟設定,並依次進入系統 > 系統資訊。
第二十步,點擊進階系統設定。
第二十一步,點擊環境變數。
第二十二步,點擊系統變數下的 Path 。
第二十三步,點擊編輯。
第二十四步,確認 TeX Live 的安裝目錄是否有出現,應像是 安裝目錄\texlive\2025\bin\windows ,如未出現,請點擊新增並自行增加該路徑。
第二十五步,點擊確定。
第二十六步,點擊確定。
第二十七步,點擊確定。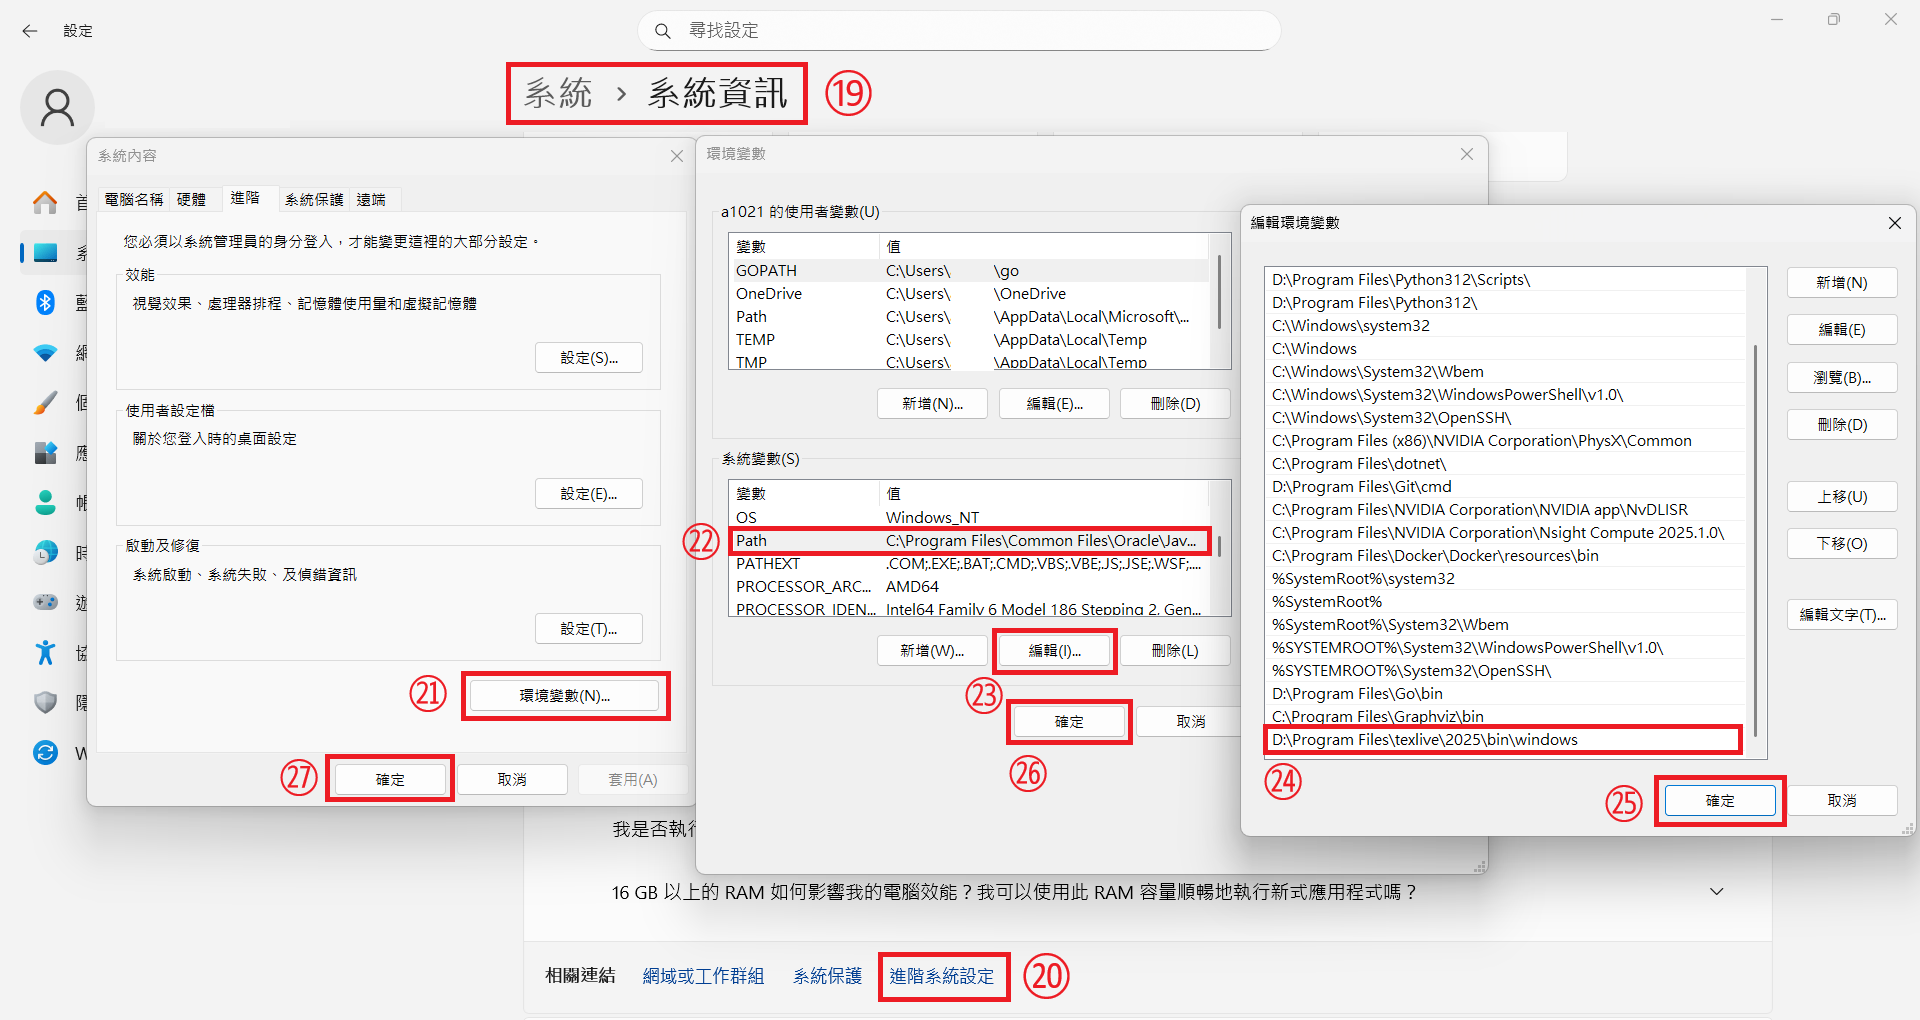
於 VS Code 中編輯
在開始用 VS Code 編輯 .tex 檔案前,我們必須安裝相關插件,才能夠調用剛才安裝的編譯器。
第一步,點擊延伸模組。
第二步,於搜尋框輸入 LaTeX 。
第三步,點擊 LaTeX Workshop 插件。
第四步,點擊安裝。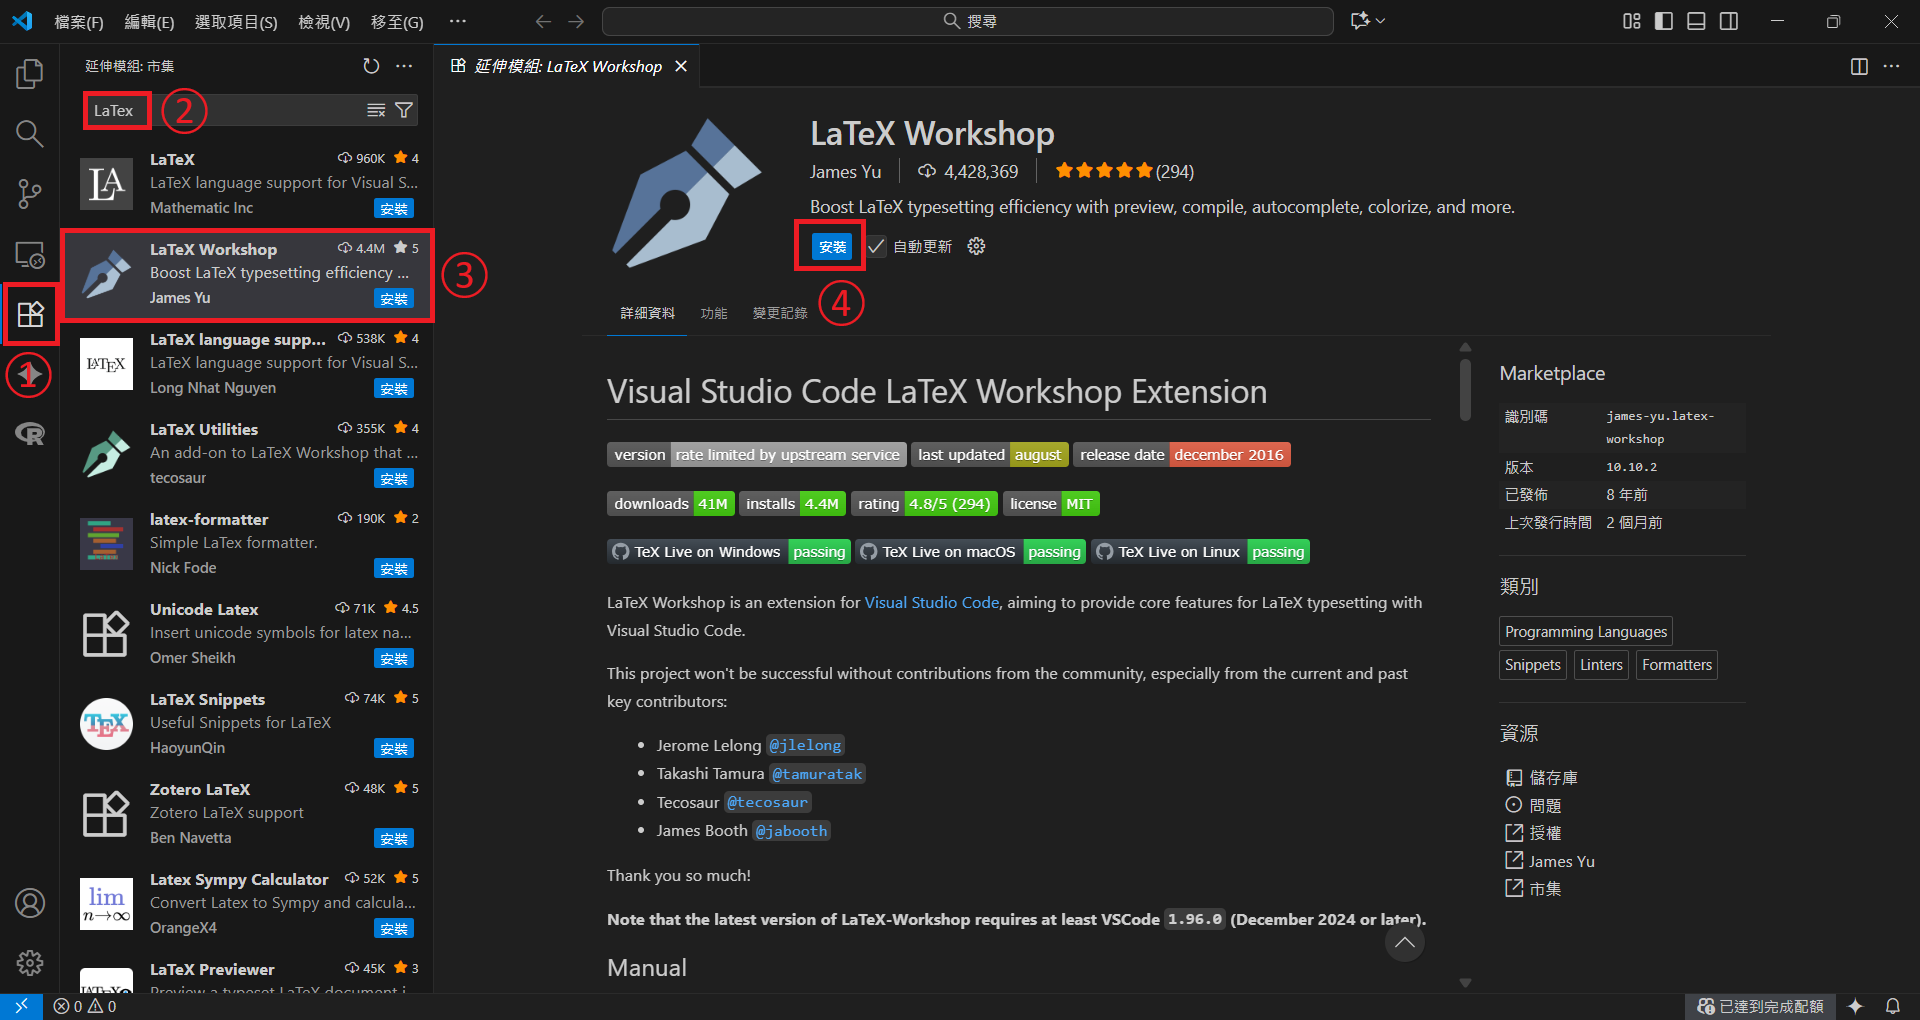
第五步,點擊信任發行者與安裝。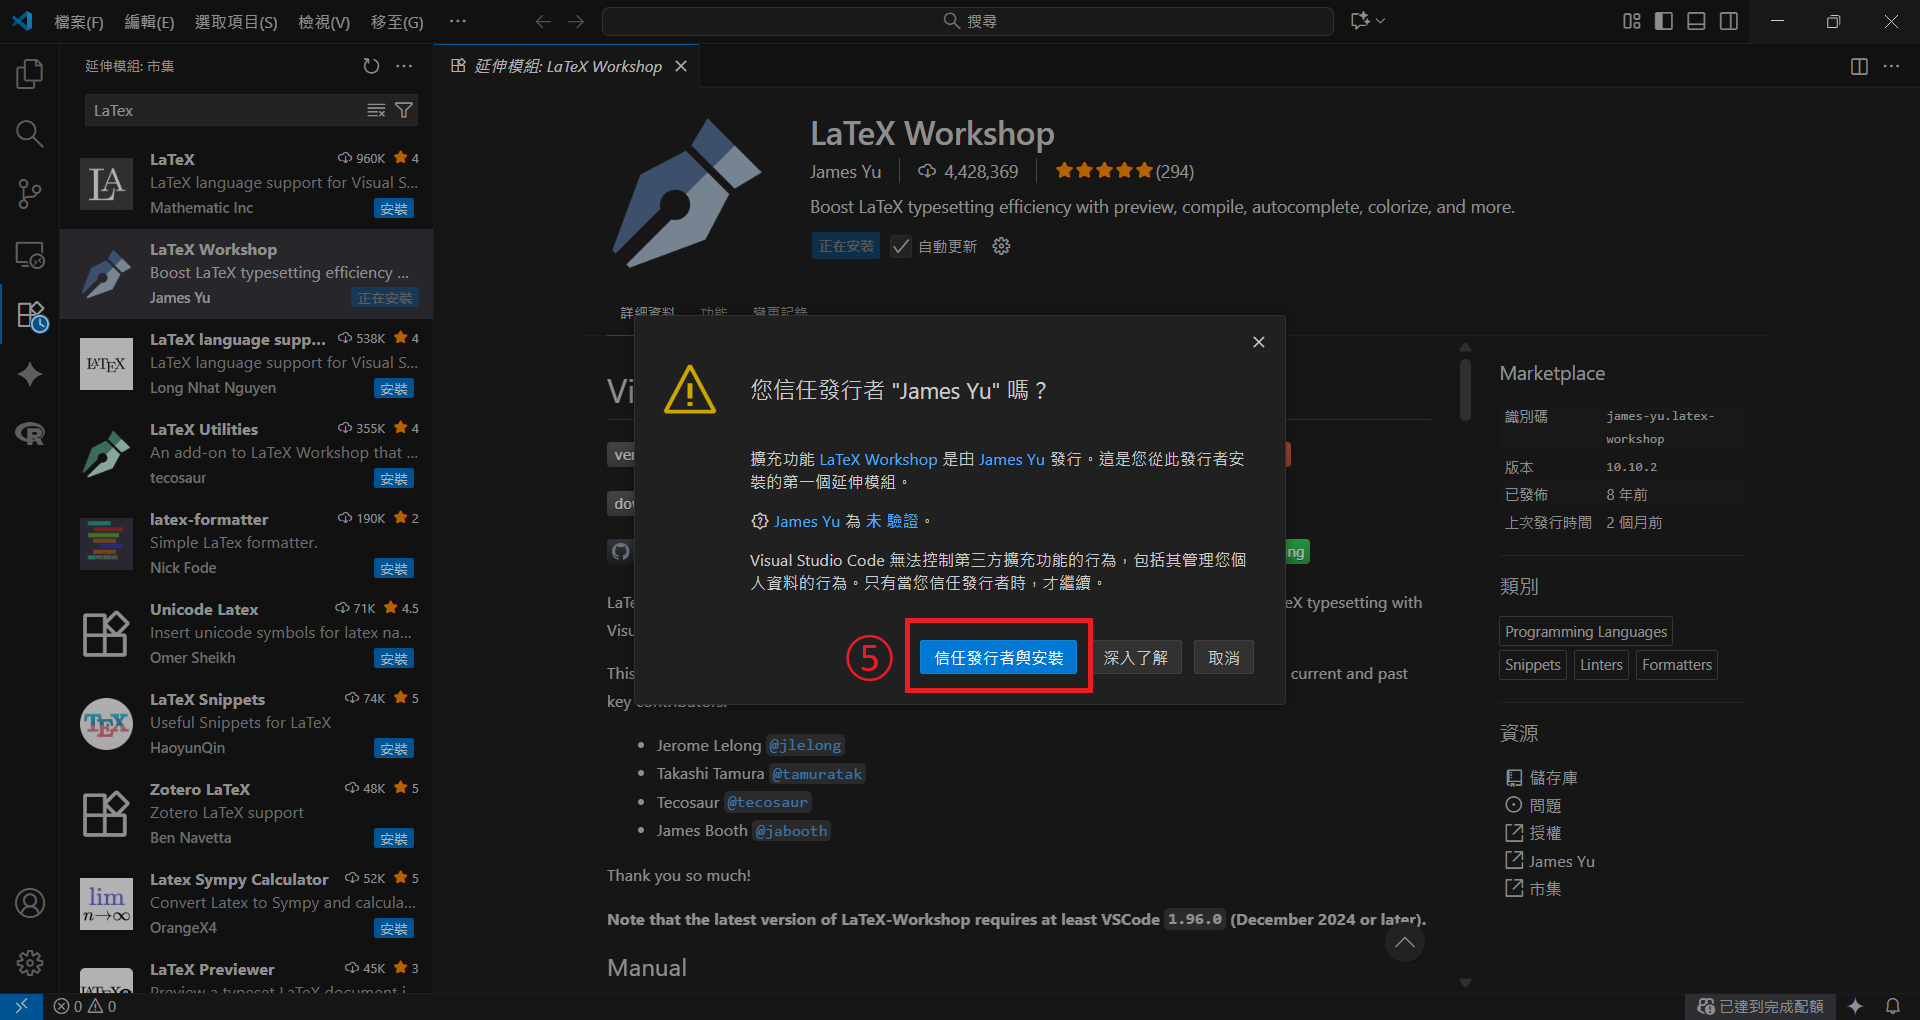
插件安裝完畢後,仍需設定才能使用剛才安裝的編譯器。
第六步,點擊管理。
第七步,點擊設定。
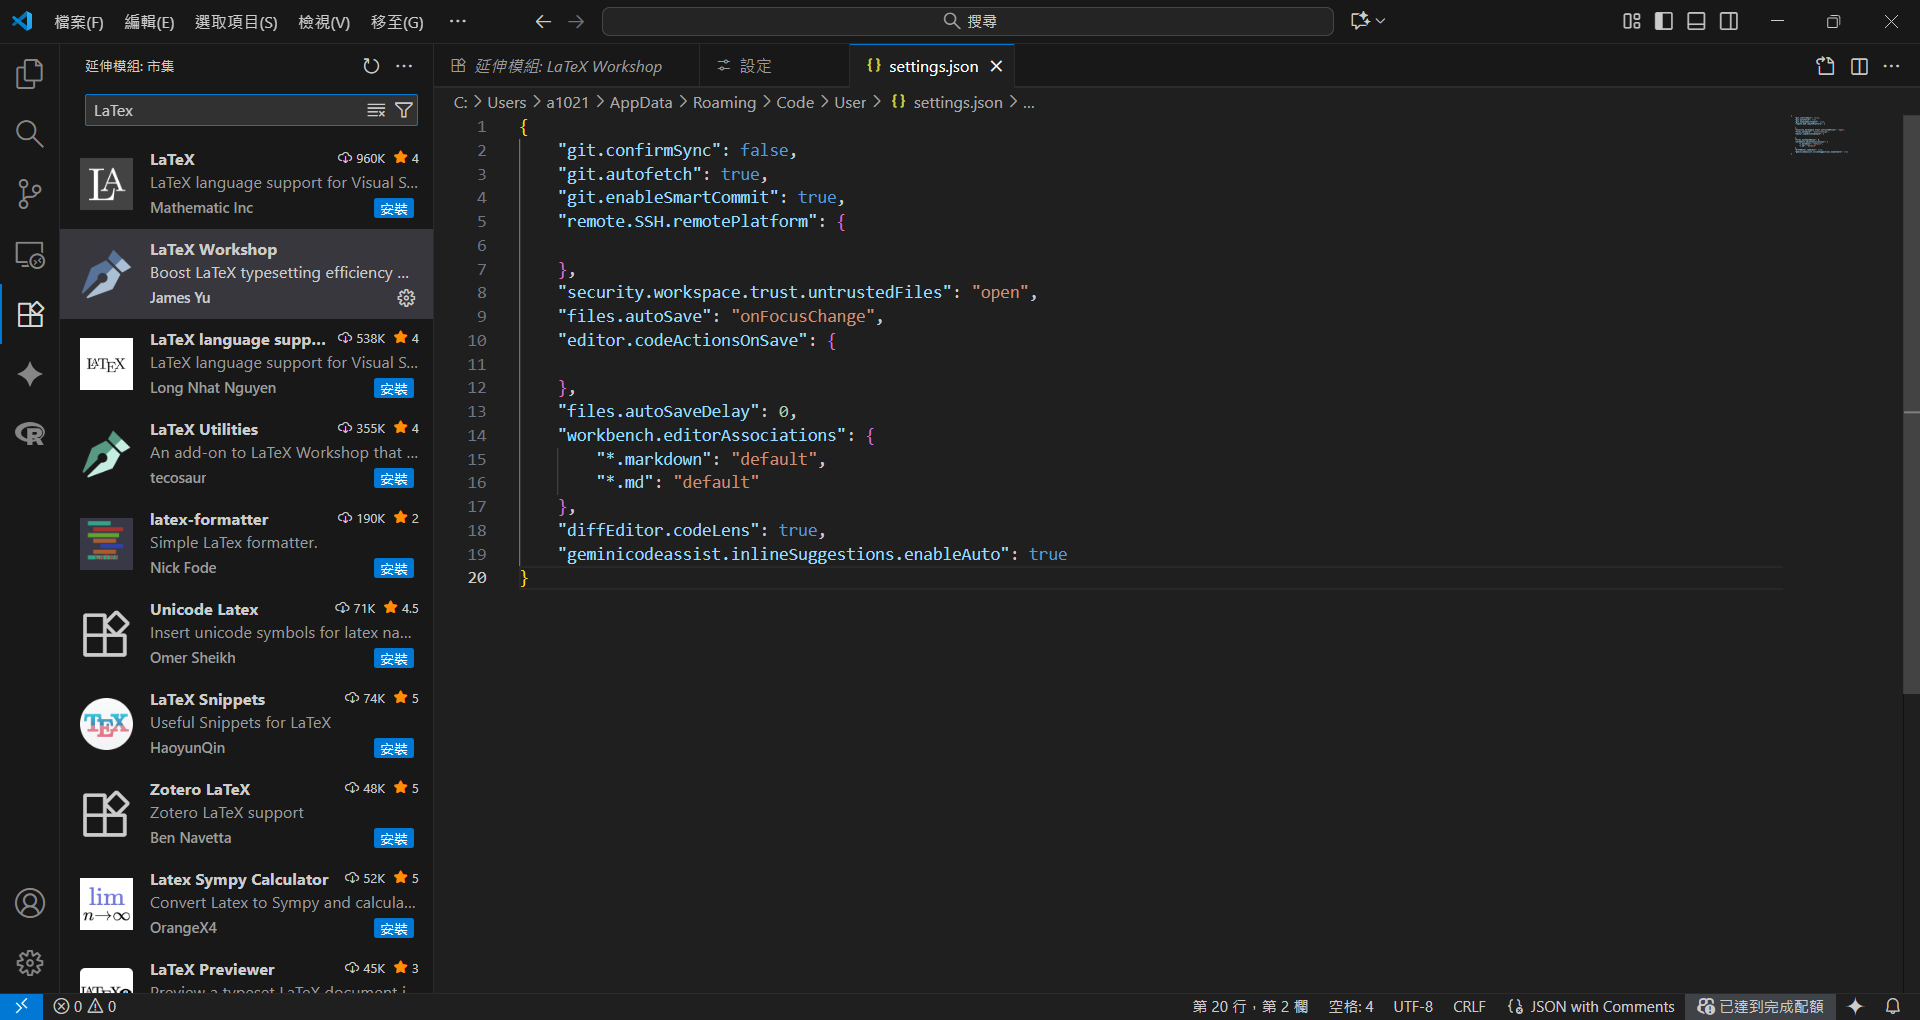
第八步,點擊開啟設定(JSON)。
這是 VS Code 的 JSON 設定文件,請於倒數第二行最後增加英文逗號,並於換行後新增如下內容:
| |
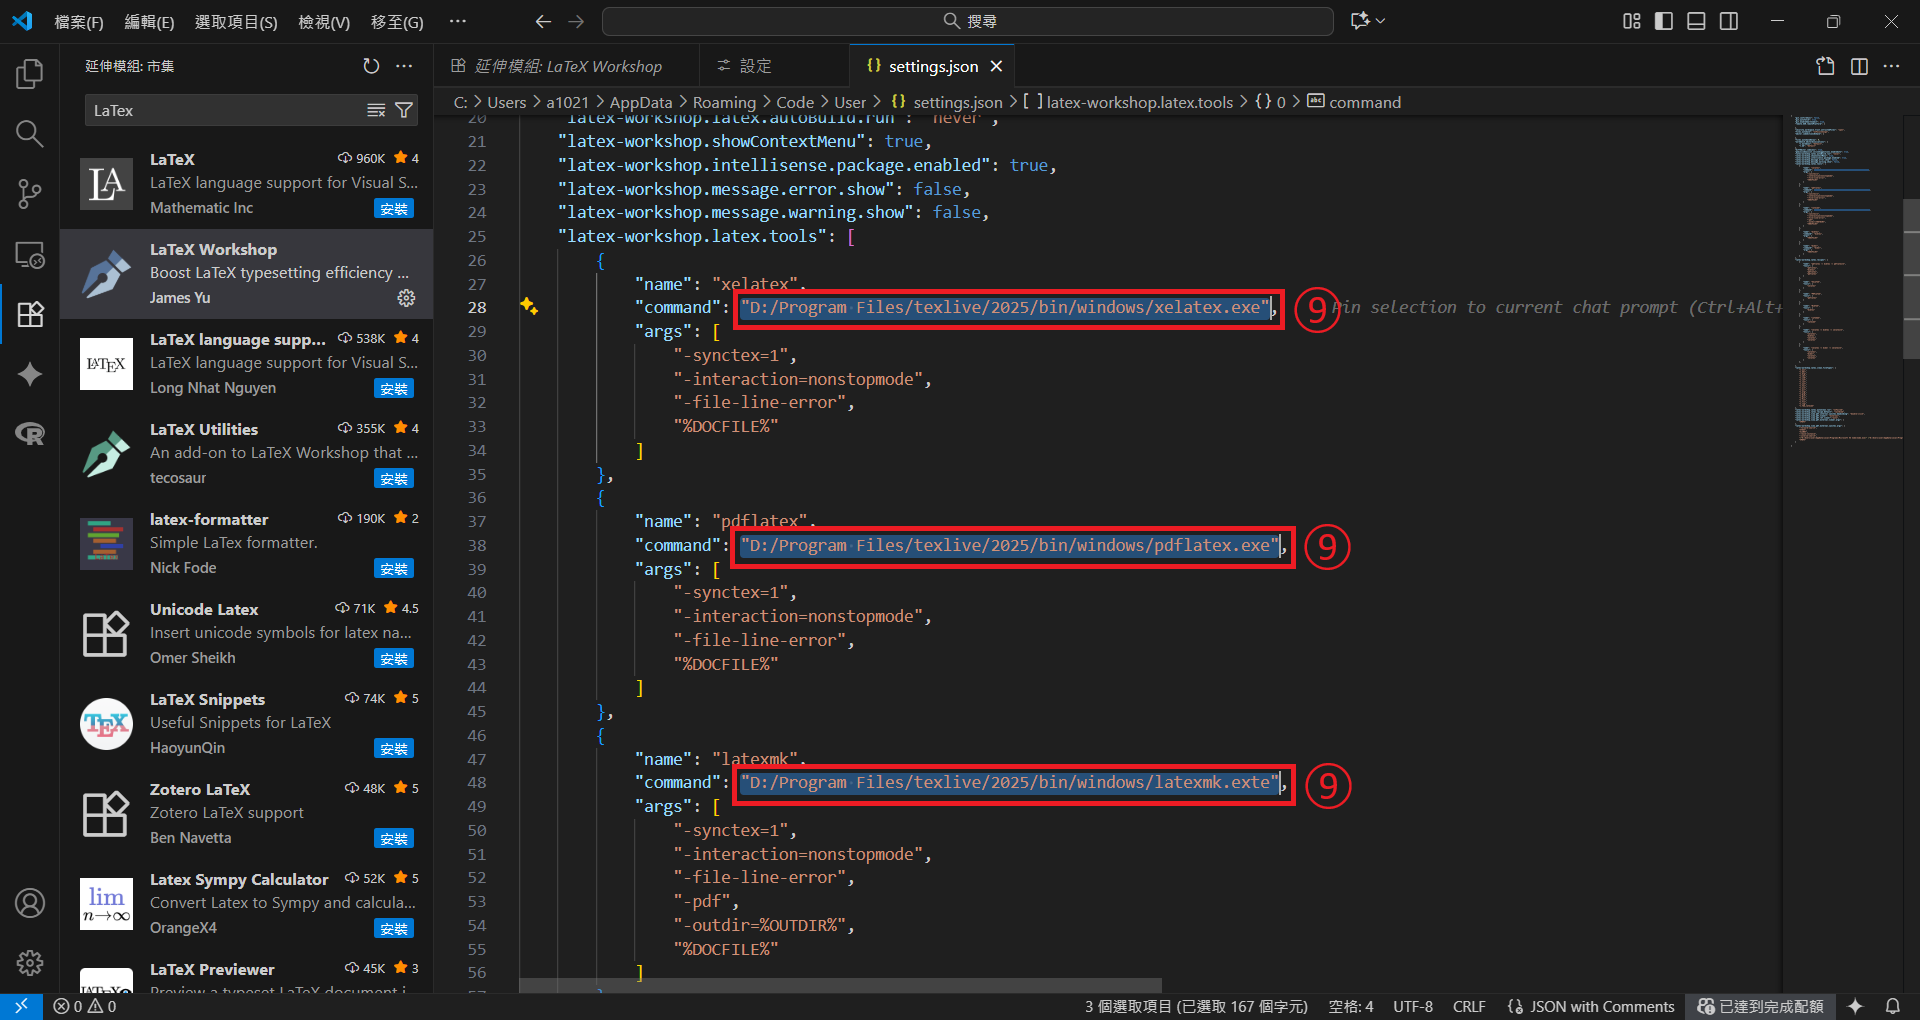
第九步,修改啟動目標。原則上來說,僅輸入 xelatex 、 pdflatex 和 latexmk 也是可以的,但有時候會遇到無法開啟的情況,就得指定其絕對路徑。
也同時修改 VS Code 相關路徑。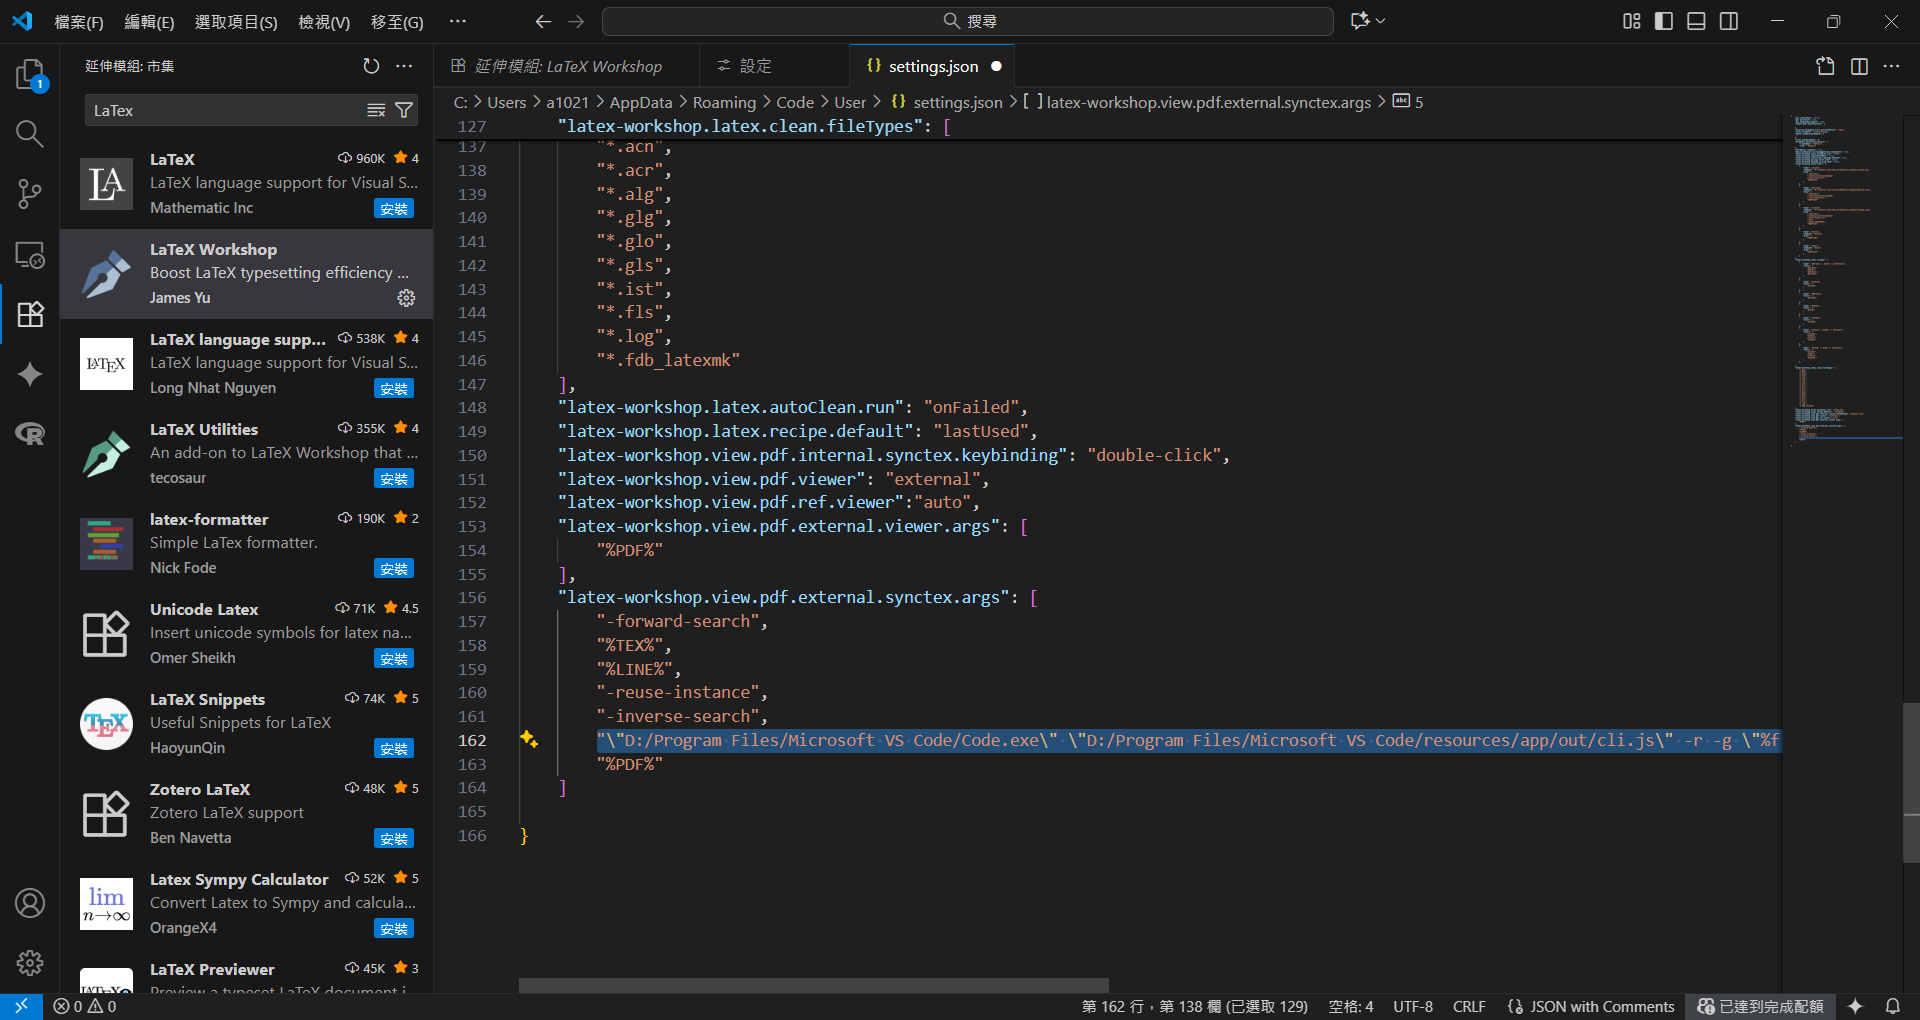
接下來就可以開始編輯文件了。
第十步,新增並點擊一個 .tex 檔案,左方便會出現 $\TeX$ 圖標。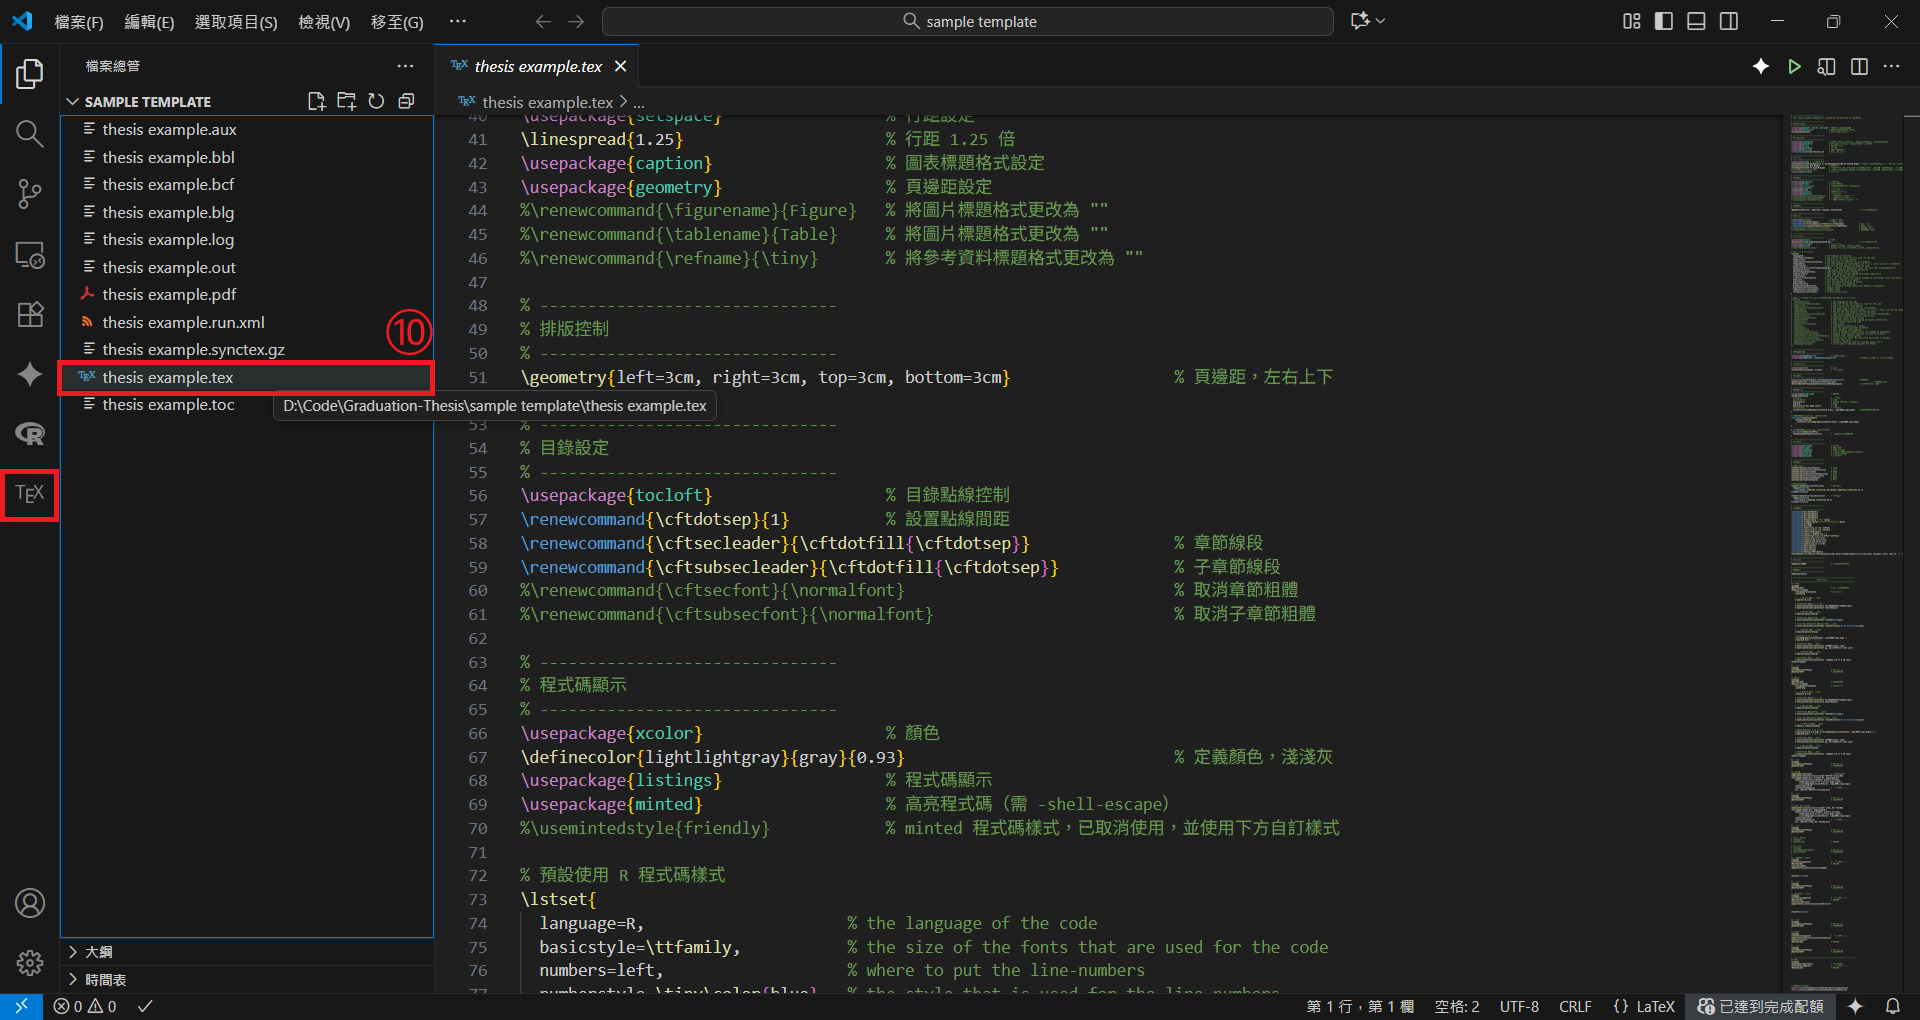
當撰寫完 $\LaTeX$ 文本後,即可開始編譯。
第十一步,點擊 $\TeX$ 圖標。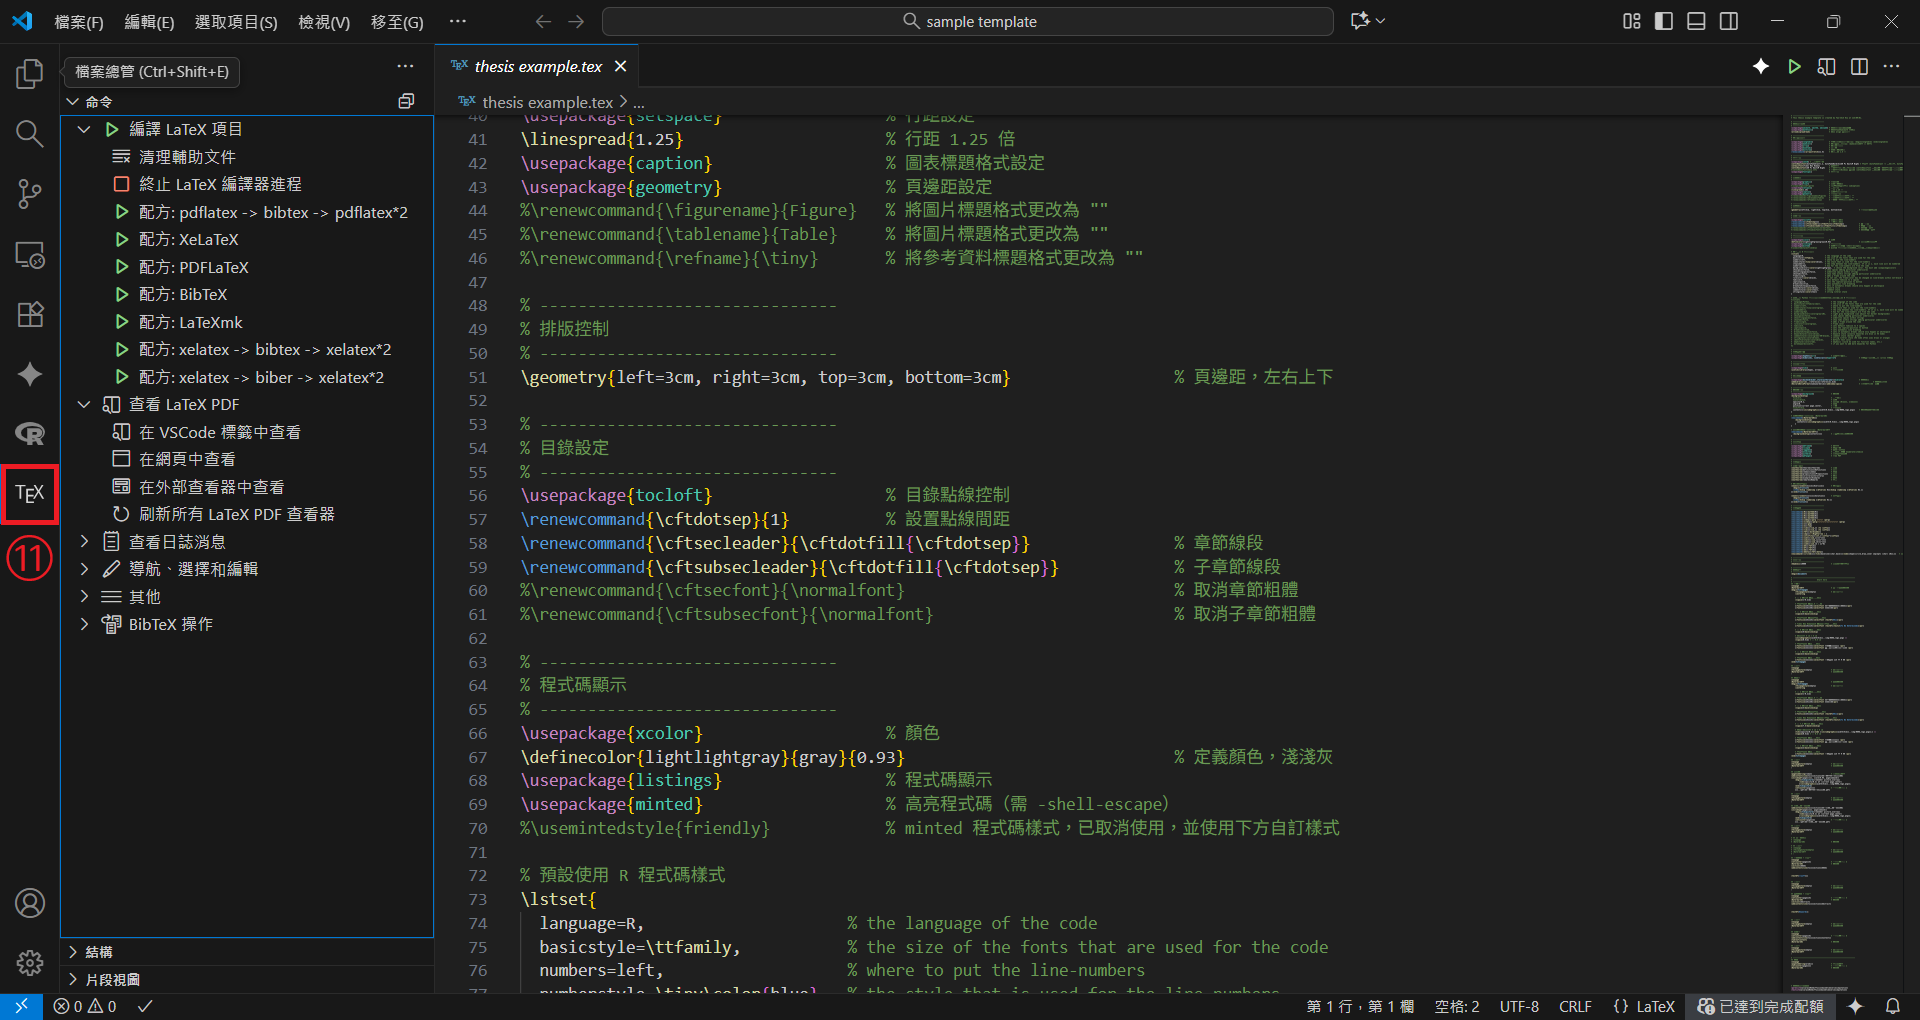
第十二步,於編譯 LaTeX 項目選擇欲使用的編譯方法。
編譯時,也可於左下角查看編譯進度。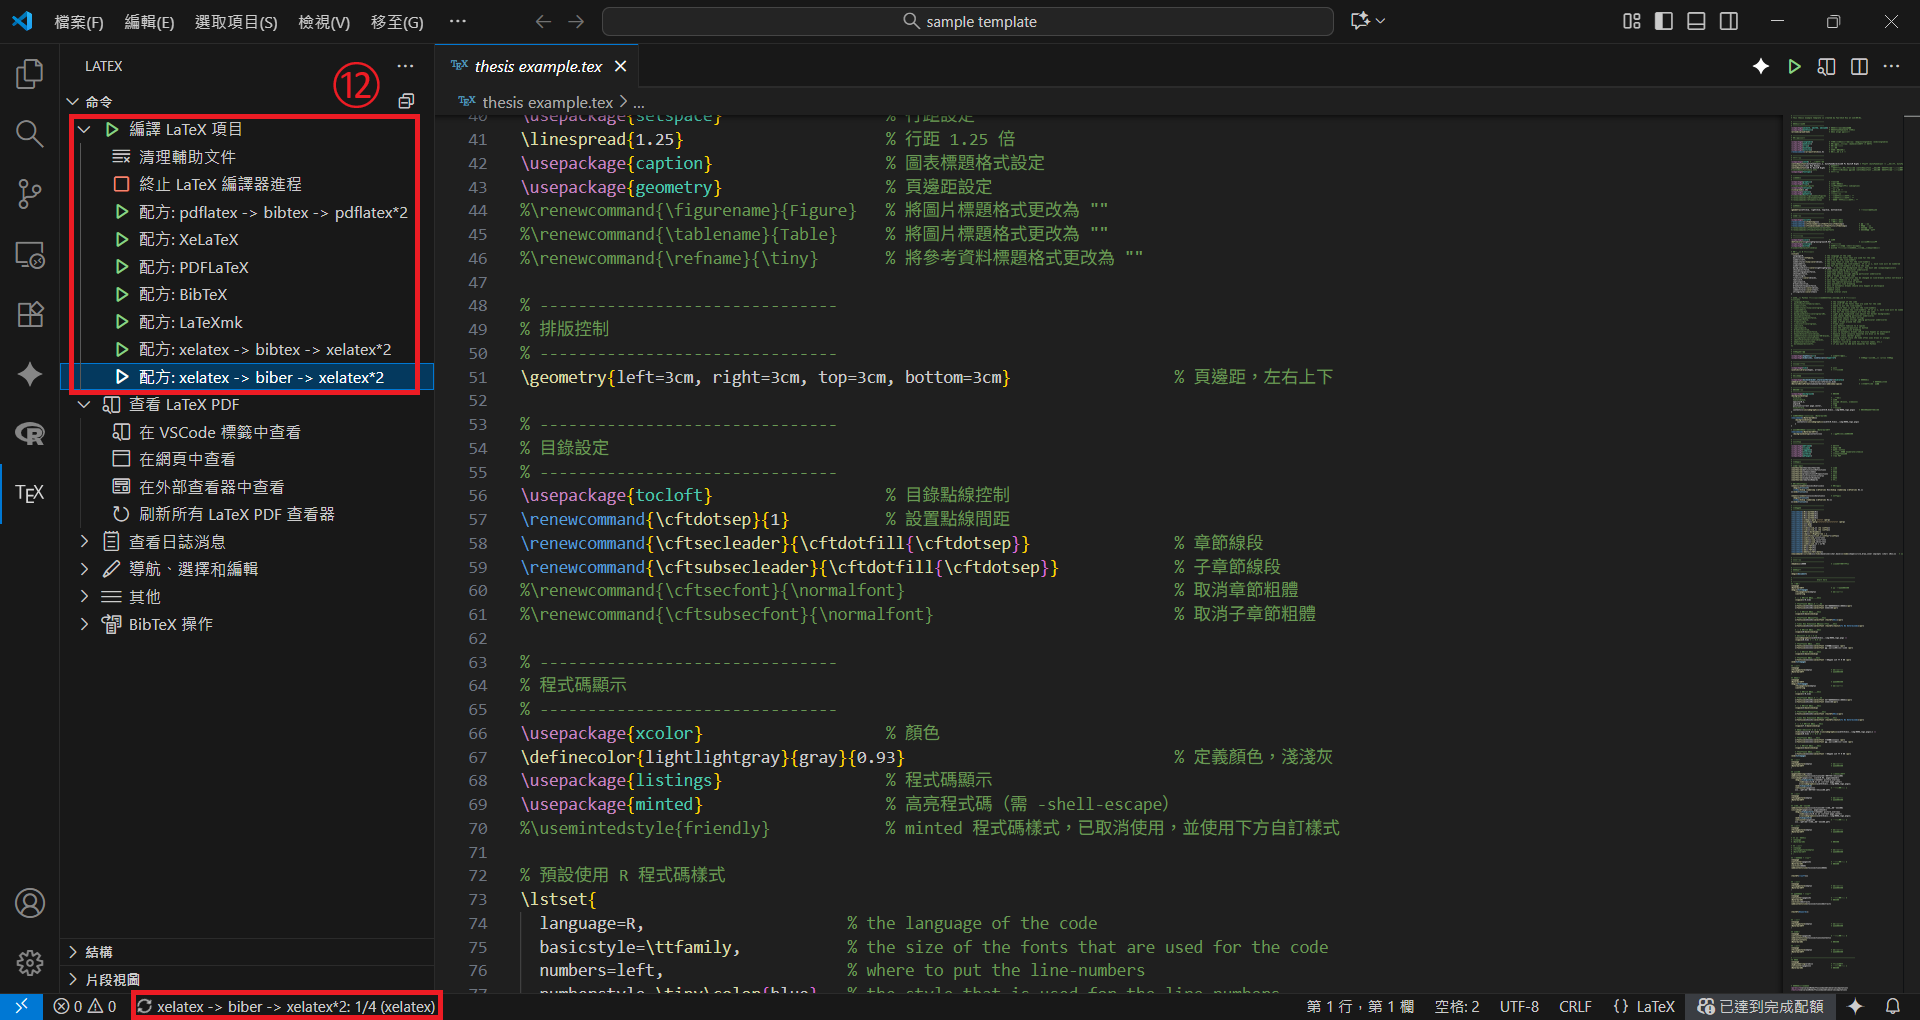
如在編譯時遇到問題,也可以查看其問題。
第十三步,點擊左下角的警告與資訊。
第十四步,查看問題標籤列的警告與資訊。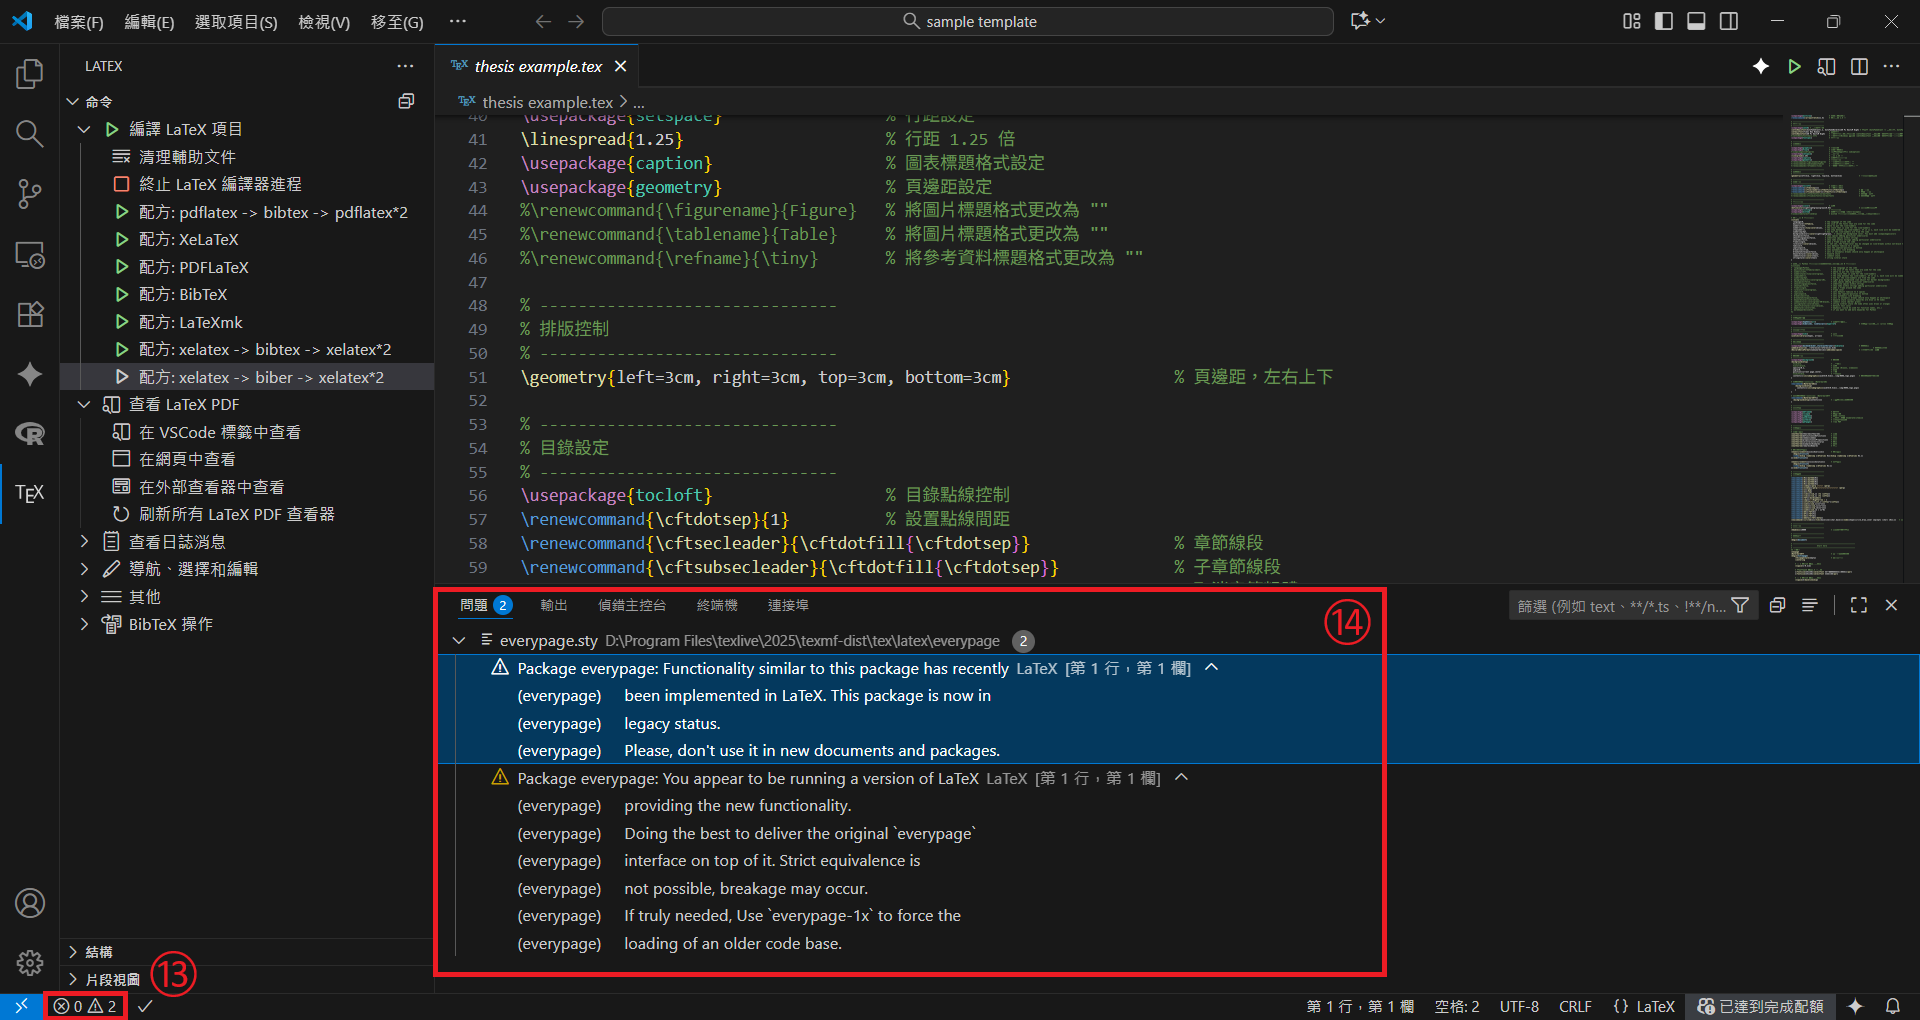
編譯成功後,可以查看其結果。
第十五步,點擊查看 LaTex PDF,並選擇於 VSCode 標籤中查看或在網頁中查看。
編譯完成後的 PDF 檔案會出現在 .tex 檔案對應的目錄。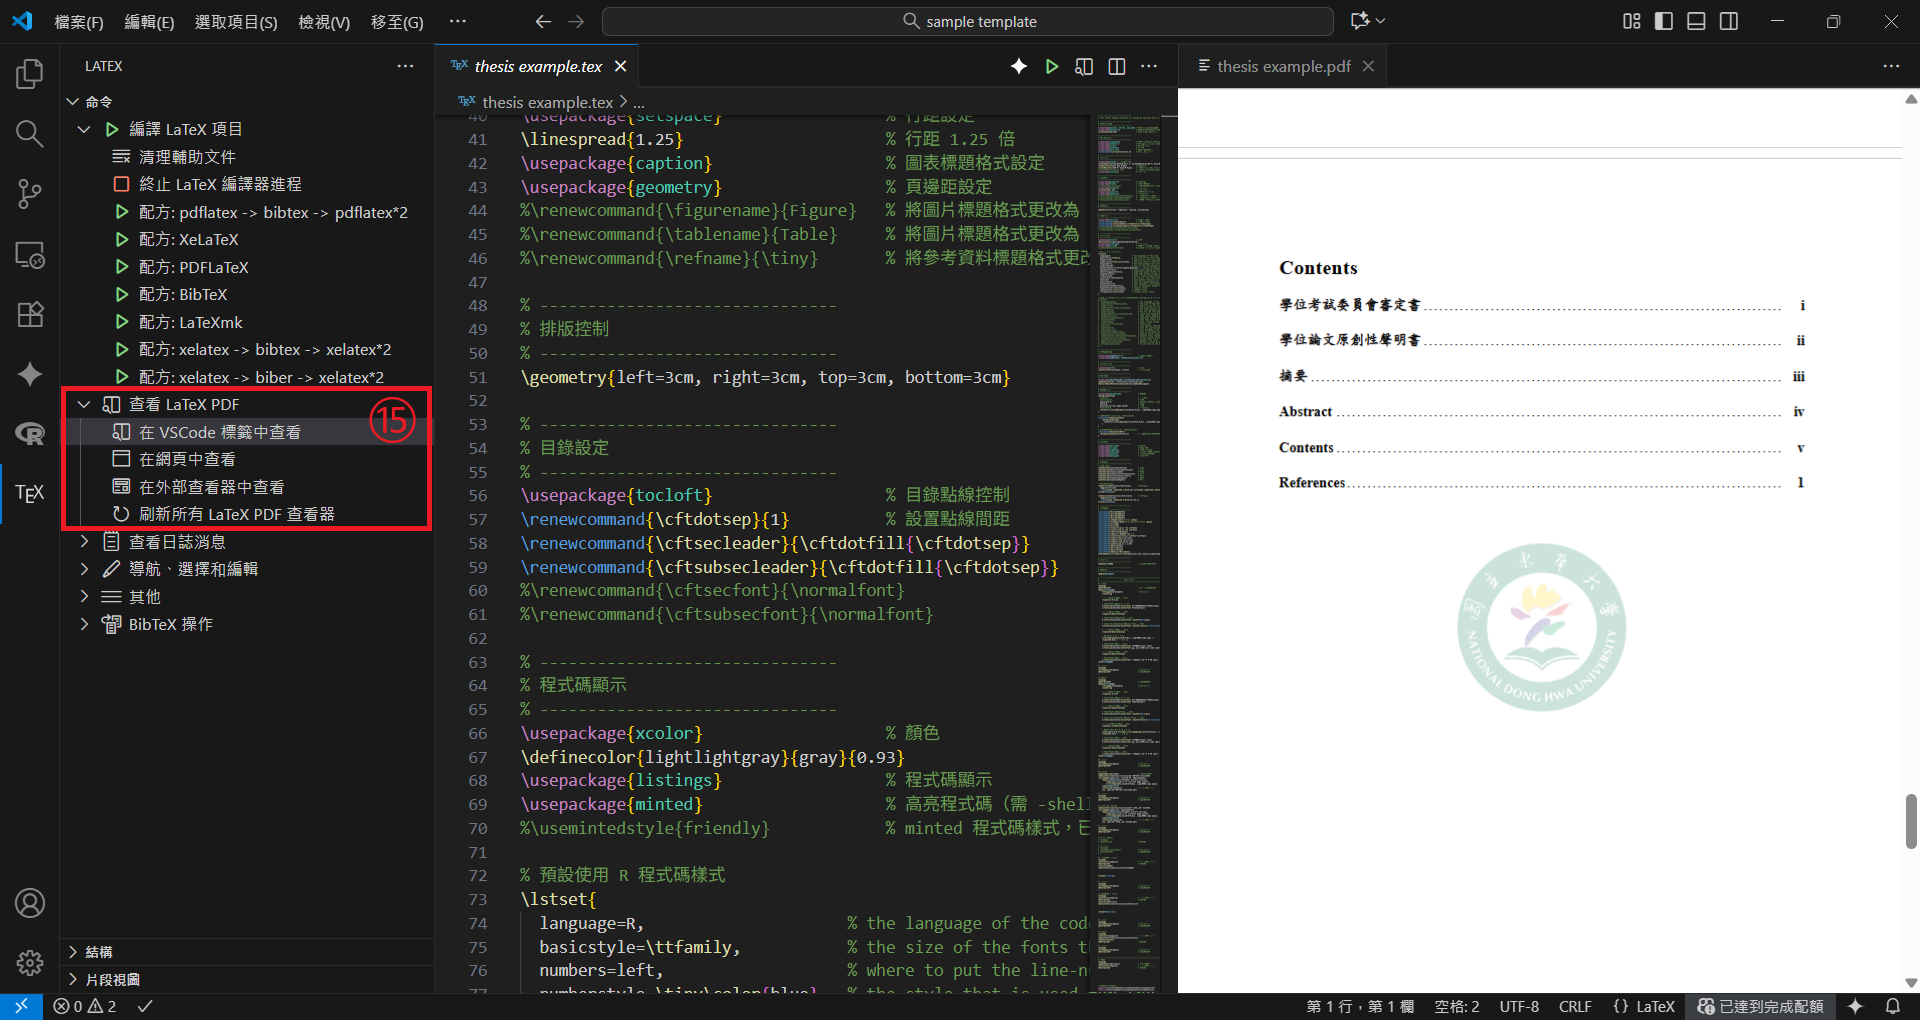
結語
$\LaTeX$ 是一個方便且強大的學術排版軟體,不僅能在不同平臺上產出美觀且一致的文件格式,還能大幅簡化以往在其他編輯軟體中常見的公式排版問題。在安裝過程中,雖可能遇到各種不同的問題,但能夠在本地環境中不限時地進行編譯,已較單純使用 Overleaf 書寫更具彈性與便利性。
參考資料
- $\textit \LaTeX$。(2025年6月30日)。維基百科,自由的百科全書。2025年11月3日參考自 https://zh.wikipedia.org/zh-tw/LaTeX
- 學術排版工具:LaTeX是什麼?從基礎教學、中文排版、符號資源到線上工具推薦。(2025年5月9日)。AsiaEdit。2025年11月3日參考自 https://asiaedit.com/zh-hant/blog/what-is-latex
- 慕ゞ笙(2025年8月8日)。2025 TexLive+VScode排版IEEE TGRS论文。CSDN。2025年11月3日參考自 https://blog.csdn.net/qq_53182191/article/details/150058750